English Čeština Deutsch V 2.15
|
|
|
- Radka Hájková
- před 8 lety
- Počet zobrazení:
Transkript
1
2

3 English... 2 Čeština Deutsch V 2.15

4 Contents Trademarks... 6 Introduction... 6 Intended use... 6 Package contents... 7 Technical specifications Safety instructions Copyright Overview Before you start Inserting/removing a memory card Inserting the battery pack Buttons LEDs Charging the Battery Setting the date and time Getting started Powering the camcorder on/off The display Selecting the operating mode Recording Recording videos English

5 Taking pictures Burst mode Time-lapse mode Self-timer WiFi mode / Controlling the action camcorder from the App The menu Menu icons Setting the video resolution Selecting the camera s field of view Setting the time-lapse options Rotating the recording by Toggling the loop recording mode on/off Toggling the diving mode on/off Deleting recordings/formatting the memory card Rotating the display image by Toggling the status LEDs on/off Customising the display brightness Customising the beeper volume Customising the auto power-off delay Setting the date and time Connecting a remote control (not included in the package) Resetting to factory defaults Connecting a microphone English - 3

6 Viewing recordings on a television Transferring recordings to a computer Connecting the camcorder to a computer Using a card reader Write-protecting the SD card adapter Software System Requirements Installing the software Uninstalling the software The main screen Setting the storage location / Selecting the language Editing recordings Viewing recordings Selecting navigation view Preview window Toolbar Importing recordings Merge videos Creating an AVCHD Disk Cutting video clips Upload to YouTube Upload to Facebook Photo album English

7 Album page Using the accessories Water-resistant case Cleaning after using under water Replacing the back cover Removing / fixing the adapter Velcro Swivel holder Replacing the adhesive pad Bike holder Adapter for other mounting systems Troubleshooting When not using the product Environmental regulations and disposal information Conformity notes Warranty and Service Information English - 5

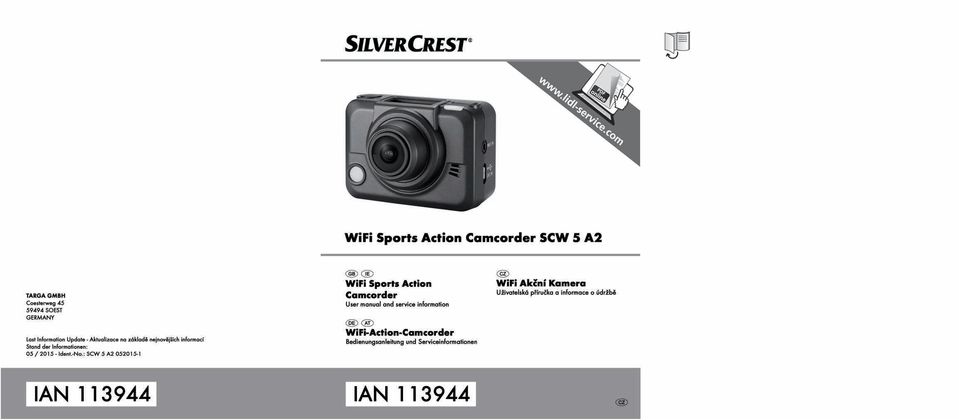
8 Trademarks Apple is a registered trademark, App Store is a service mark of Apple Inc., registered in the USA and other countries. Google is a registered trademark of Google Inc. HDMI, the HDMI logo and High-Definition Multimedia Interface are trademarks or registered trademarks of HDMI Licensing, LLC in the USA and other countries. Microsoft Windows is a registered trademark of Microsoft Corporation, USA. SD and SDHC are registered trademarks. USB is a registered trademark. Other names and products can be the trademarks or registered trademarks of their respective owners. Introduction Thank you for purchasing this SilverCrest SCW 5 A2 action camcorder. The action camcorder is the ideal companion for your sports activities. Its extensive accessories allow you to use the action camcorder for the most different scenarios. It allows you to capture wonderful memories at any time. Intended use Your camcorder is a Consumer Electronics device and is designed exclusively for recording movies and pictures. Any use other than that mentioned above does not correspond to the intended use. The device may only be used for private purposes, not for industrial or commercial ones. This device fulfills all standards and directives listed in the Declaration of Conformity. If any changes are made to the equipment other than those endorsed by the manufacturer, compliance with these standards and directives can no longer be guaranteed. Only use accessories recommended by the manufacturer. Observe the regulations and laws in the country of use. 6 - English

9 Package contents SilverCrest SCW 5 A2 Remove the camcorder and all accessories from the package and verify that you have received all items listed. Remove all package material. If you find anything missing or damaged, please contact the Customer Service. SilverCrest SCW 5 A1 action camcorder FJ-SLB-10A battery 4 GB microsd card (incl. SD card adapter) USB cable HDMI cable Water-resistant case (incl. adapter) English - 7

10 Lens cover Water-resistant back cover (incl. adapter) (mounted on the water-resistant case) (orange seal) Open back cover (yellow seal) Bike holder Swivel holder Adapter for other mounting systems 8 - English

11 Flat adhesive socket Curved adhesive socket Velcro with latch Velcro without latch 3 x adhesive pads for replacement 6 x anti-mist pads CD-ROM with software (lineart illustration) User manual (lineart illustration) There is a separate "GNU General Public License" flyer included with the product. You can also download this flyer at English - 9

12 Technical specifications Capture sensor Lens Display Internal memory External memory 10 - English 5-megapixel CMOS sensor Wide-angle, F2.8, f=2.5mm OLED status indicator 128MB (approx. 89,9MB free / partially used by firmware) microsd/sdhc (up to 64GB) Memory card: 4 GB microsd / Speed Class 4 Operating modes Video recording, picture recording Video Format: H.264 (MP4) Resolution: Photo Format: JPEG Resolution: 1080p 1920 x 1080 (30 fps) 960p 1280 x 960 (30 fps) 720p 1280 x 720 (60 fps) 5 megapixel Power supply 5V, 0.5A for power supply via PC USB port 5V, 1.0A for power supply via external power adapter Battery charging time Runtime with fully charged battery Battery Connectors and sockets USB 2.0 approx. 3.0 hours for power supply via PC USB port approx. 2.5 hours (for power supply via external power adapter) approx. 1.5 to 2.0 hours Li-Ion battery FJ-SLB-10A / 3.7V, 1130mAh Manufacturer: FUJI ELECTRONICS(SHENZHEN) CO.,LTD HDMI MIC IN (2.5mm jack)

13 Microphone built-in Built-in wireless receiver Modulation: GFSK Frequency: 2403MHz to 2477MHz Data transfer speed: 250kbps / 1Mbps / 2Mbps Number of channels: 75 WiFi standards b, g, n Operating temperature * 0 C to +35 C Storage temperature * 0 C to +45 C Relative humidity max. 85 % rel. humidity Dimensions (W x H x D) approx. 60 x 43 x 43 mm Weight (incl. approx. 80 g rechargeable battery) SilverCrest SCW 5 A2 * Temperatures below 0 C may reduce the battery capacity and/or lifetime. Please have this in mind when practicing winter sport activities, as the maximum runtime may be significantly reduced. If you want to use your camcorder at temperatures below 0 C you should install it in the water-resistant case with the water-resistant back cover. This guarantees that the heat released from the camcorder operation also heats up the battery. When not using the camcorder you should store the battery in your pocket, for example. The technical specifications and design can be changed without prior notice. English - 11

14 Safety instructions Before you use this device for the first time, please read the following notes and heed all warnings, even if you are familiar with handling electronic devices. Keep these operating instructions in a safe place for future reference. If you sell the device or pass it on, it is essential that you also hand over this manual, as it is part of the product. DANGER! This symbol and the word Danger alert you to a potentially dangerous situation. Ignoring it can lead to severe injury or even death. WARNING! This symbol and the word Warning denote important information required for the safe operation of the product and for the safety of its users. This symbol denotes further information on the topic. To power the camcorder use the supplied battery pack only (manufacturer: FUJI ELECTRONICS(SHENZHEN) CO.,LTD / model: FJ- SLB-10A) English DANGER! Always make sure that the device is not exposed to direct heat sources (e.g. radiators); no direct sunlight or bright artificial light reaches the device; the camcorder is used within the allowed operating temperature range from 0 C to 35 C only; contact with spray, dripping water and corrosive liquids is avoided and the device is never operated near water; in particular the device may never be immersed in liquids (do not place any objects containing liquids, such as vases or drinks, on or near the device);

15 Dripping and sprayed water and immersing the device is allowed only after the camcorder has been fitted into the protective water-resistant case; the device is never placed near magnetic fields (e.g. speakers); no naked flames (e.g. burning candles) are placed on or near the device; no foreign bodies can penetrate into the device; the device is not exposed to any extreme temperature fluctuations as this can cause moisture through condensation and cause short-circuits; if the device has been exposed to strong temperature variations, wait for it to reach the ambient temperature before switching it on (about 2 hours); the device should not be subject to excessive shocks and vibrations; the device and its accessories are not damaged in order to avoid any further risks. Therefore you must inspect the device and its accessories regularly for any damage. If you find any component damaged, it must not be used. Never open the camcorder housing and have all repairs performed by qualified technical staff only. Failure to heed the warnings above may result in damage to the device or injury. WARNING! Recordings (photo/video) of persons and the right on the own image Please note that when recording any persons, whether portraits or groups of persons, every person has the right on her/his own image/recording. Recording underaged people is subject to the consent of the parents. In order to avoid any legal measures, make sure to respect the legislation of the country of use. WARNING! Using on the road Please note that using the camera on the road, whether driving a car, riding a bicycle or as a pedestrian may distract you from the traffic resulting in severe accidents. This may harm your health and/or result in legal actions. Therefore the camera may only be operated while the vehicle is not running. In some countries it can even be forbidden to use it in a car and result in legal actions. Please make sure to respect the legislation of the country of use. English - 13

16 DANGER! Children and persons with disabilities Electrical devices are not suitable for children. Also persons with reduced physical, sensory or mental capabilities should only use electrical devices in appropriate circumstances. Do not allow children or persons with disabilities to use electrical devices unsupervised, unless they are instructed accordingly and supervised by a competent person responsible for their safety. Children should always be supervised to ensure that they do not play with the product. Small parts can represent choking hazards. Keep the packaging away from children and persons with disabilities. DANGER! There is a risk of suffocation! DANGER! Battery Always insert the battery pack with the correct polarity. The correct polarity is labelled on the battery and inside the battery compartment. Never throw a battery into fire. Remove the battery pack if you do not plan to use the camcorder for a while. Improper use could cause explosions or leaks. Batteries must never be opened or deformed. Otherwise any leaking battery fluids may cause injuries. If the battery fluid becomes in contact with the skin or eyes, rinse immediately with plenty of water and seek medical aid. Only operate this device with the battery pack supplied in order to avoid overheating, deformation of the casing, fire, electric shocks, explosion and other hazards. Batteries must be disposed of at specific collection points English

17 DANGER! risk of explosion! Improper use of the battery pack may cause explosions or leaks. Never replace the battery in an explosion-sensitive environment. While inserting or removing the battery a spark may be produced that could cause an explosion. Please head the usage restrictions of prohibitions regarding battery-powered devices at dangerous places like fuel storage areas. Explosion-sensitive areas are normally (but not always) labelled. These include fuel storage areas such as below deck on a boat, fuel line or tank areas, environments where the air contains inflammable substances (e.g. cereals dust or metal powder) and any areas where you should normally switch off your car engine. Respect the environment. Old batteries must not be disposed of with domestic waste. They must be handed in at a collection point for waste batteries. WARNING! Cables Always hold cables by the plug and never pull on the cable itself. Never place heavy objects or furniture on the cables and take care that the cord does not become trapped, especially at the plug and sockets. Never tie knots in a cable and do not tie them to other cables. All cables must be laid so that nobody can trip over them or be obstructed by them. English - 15
 and any areas where you should normally switch off your car engine.")
18 WARNING! Water-resistance The camcorder itself is not water-resistant. It can only be used under water in combination with its water-resistant case. The water-resistant case is water-resistant up to a depth of 60 m. To guarantee its water resistance, do not use the camcorder with the water-resistant case for longer than 60 minutes under water at a time. The water resistance of this camcorder applies to salt and fresh water only. It does not apply to any cleaners, chemicals, solvents or water in public swimming pools. Liquids of this kind must be wiped off the water-resistant case immediately. Only use the water-resistant case in water of temperatures between 0 C and 35 C. Avoid excessive vibration or shaking under water. Otherwise there is a risk that the water-resistant case opens. This can damage the camcorder and any recordings. Maintenance WARNING! Maintenance / cleaning Repairs are required when the device or its housing has been damaged in any way, for example, when liquids or objects have entered the product, when the product does not work normally or when the product has been dropped. If smoke, unusual noises or smells are noticed, power off the device immediately and remove the battery. If this occurs, do not continue to use the device and have it checked out by an expert. All repairs must be carried out by qualified service personnel. Cleaning Use a soft, lint-free cloth for cleaning. Do not use any cleaners, detergents or solvents, as these may enter the housing and cause permanent damage to the product English

19 Please read the notes on Cleaning after using under water on page 65. Copyright All the contents of this user manual are protected by copyright and provided to the reader for information only. Copying data and information without the prior explicit written consent of the author is strictly forbidden. This also applies to any commercial use of the contents and information. All texts and diagrams are up-to-date as of the date of printing. English - 17

20 Overview An additional illustration of the items and controls and their corresponding numbers can be found on the inner page of the fold-out cover of this user manual. You can keep this page folded out whilst reading the different chapters of this user manual. This allows you to refer to the relevant controls at any time. 1 Display 2 On/Off/Mode button 3 Status LED 4 Speaker 5 Lens 6 Status LED 7 microsd card slot 8 HDMI output 9 Record button 10 Battery compartment 11 Status LED 12 Microphone 13 USB/charging connector 14 Microphone connector 15 Status LED 18 - English

21 Before you start Inserting/removing a memory card You should insert a microsd memory card to record your videos and pictures. If there is no microsd memory card inserted, all recordings will be stored on the internal camcorder memory. As the internal memory is very small, only a few recordings may be stored. Insert the supplied microsd in order to be able to store more recordings. Proceed as follows: Power the camcorder off before you insert or remove a memory card. Insert the memory card with the contacts facing towards the front of the device (towards the lens [5]) into the microsd card slot [7] until it clicks in place. To remove the memory card, gently press on the inserted card. The memory card will protrude a little so that you can get a hold of it and remove it. Only use Speed Class 4 or faster memory cards. Otherwise image and/or sound distortion may occur during video recording. If the memory card or the internal memory is full, the message FULL appears on the bottom line of the display [1]. English - 19
22 Inserting the battery pack Insert the battery pack as follows into the camcorder: Open the battery compartment [10]. To do so, press on the ribbed area of the battery compartment cover and slide it into the direction of the arrow until the closed arrow on the cover and the opened arrow on the camera housing are aligned. Next lift the battery compartment cover to remove it. Align the contacts of the battery pack with the contacts in the battery compartment [10]. Make sure that the [+] and [-] contact markings on the battery and in the compartment [10] match. Next fully insert the battery pack into the battery compartment [10]. Make sure to place the end of the strip over the battery pack English
23 Close the battery compartment [10]. To do so, press on the ribbed area of the battery compartment cover and slide it into the direction of the arrow until the closed arrow on the cover and the closed arrow on the camera housing are aligned. To remove the battery pack, open the battery compartment [10] as described above. Pull the strip to remove the battery. On delivery, the battery pack is not charged. Please fully charge the battery before using the product for the first time. English - 21
24 Buttons Button Function On/Off/Mode button [2] Press and hold this button for at least 3 seconds to switch the camcorder on or off. Press this button several times while the camcorder is switched on to toggle between the different operating modes (Video, Photo, WiFi, Burst, Time-lapse, Selftimer and Menu). Press this button while the menu is shown to navigate through the menu items. Record button [9] Press this button in Video mode to start or stop recording. Press this button in Photo mode to take a picture. Press this button while the menu is shown to select a menu item. LEDs The status LEDs can be found on the top, bottom, front and back panels of the camcorder. They allow you to monitor the camcorder status under the most different mounting scenarios. LED Colour Description Status LED [3] Status LED [3, 11 and 15] Status LED [6] 22 - English Green Slowly flashing green Fast flashing green Flashing red Flashing green/orange or red Flashing orange Off Operation: Powering on or photo capture. USB Mode: Charging battery Operation: WiFi is enabled USB Mode: Camcorder powered on Operation: Video recording in progress Operation: Self-timer enabled Operation: Recording video or self-timer enabled USB Mode: Charging battery USB Mode: Battery is fully charged
25 Charging the Battery It is possible to recharge the camcorder battery pack via the USB power of a computer. To do this, you will need the USB cable supplied. Insert the battery pack as described above into the camcorder. Use the USB cable to connect the camcorder to an available USB port on a computer. Insert the small plug of the supplied USB cable into the USB/charge port of your camcorder [13] and the large plug into a USB port on your computer. You can keep the camcorder powered off while charging. Press and hold the On/Off/Mode button [2] for three seconds to switch the camcorder off. The status LED [6] flashes orange during charging. When the charging process is complete, the status LED [6] goes out. Some computers do not supply USB power while they are turned off. If the camcorder does not charge, make sure your computer is switched on. English - 23
26 In addition to the option above, you can also connect the camcorder to an external USB power adapter (not supplied) in order to charge the battery pack. To do this, you will need the USB cable supplied. You can purchase a suitable 5V USB power adapter with at least 1A from any electronics retail outlet. When using an external power adapter, it must be connected to an easily accessible wall outlet in order to be able to disconnect it quickly in case of an emergency. Setting the date and time To set the date and time: Press and hold the On/Off/Mode button [2] for at least 3 seconds to switch the camcorder on. The camcorder initialises in Video mode automatically. To open the menu, press the On/Off/Mode button [2] six times. If the display is in dimmed power-saving mode, press the On/Off/Mode button [2] once to toggle to active mode. Press the record button [9] to open the menu. The following menu is shown: 24 - English
27 SilverCrest SCW 5 A2 The SETUP menu will be highlighted. Press the On/Off/Mode button [2] multiple times to select the MORE menu and then press the record button [9] to confirm. Press the On/Off/Mode button [2] multiple times until the TIME menu is highlighted. Press the record button [9] to open the TIME menu. Next you can set the year, month, day, hours and minutes in sequence. Select the variable that you want to set by pressing the On/Off/Mode button [2]. Press the record button [9] to increase the value stepwise. After all settings have been entered, press the On/Off/Mode button [2] to select OK. Press the record button [9] to confirm. To exit the MORE menu, press the On/Off/Mode button [2] multiple times until the EXIT item is highlighted and then press the record button [9] to confirm. Next you can use the On/Off/Mode button [2] to select an operating mode. English - 25
28 Getting started Powering the camcorder on/off Press and hold the On/Off/Mode button [2] for at least 3 seconds to switch the camcorder on or off. While powering on the status LED [3] goes green. The display The display [1] shows the following information: No. Icon* Description 21 Number of recordings saved (pictures and videos) 22 Battery capacity Alternates between the following: Displays the field of view of the camera: WIDE or ULTRA Shows the remaining storage space in percentage. Displays the option that is executed when pressing the record button [9]. When this icon is shown, pressing the record button [9] starts a video recording. When this icon is shown, pressing the record button [9] captures a picture English
29 No. Icon* Description Shows the operating mode currently selected. Video mode: Use this mode for video recording. This icon also resumes the current video recording settings. Photo mode: Use this mode for taking pictures. 25 WiFi Mode: In this operating mode you can enable or disable the WiFi function. While WiFi is enabled, you can control the camcorder from the SilverCrest Action Camcorder App. Burst mode: Use this mode to take a series of 10 pictures. Time-lapse mode: Use this mode for time-lapse picture or video recording. This icon also resumes the current settings. Self-timer: Use this mode for self-timer shots. Setup: Use this mode to customise the camcorder settings. * The icons may vary depending on the selected setting. English - 27
30 Selecting the operating mode Press the On/Off/Mode button [2] several times to toggle between the different operating modes. The currently selected mode is indicated on the top-left corner of the display [1]. The modes are cycled as follows: Video mode Photo mode WiFi Mode Burst mode Setup Self-timer Time-lapse mode If the display is in dimmed power-saving mode, press the On/Off/Mode button [2] once to toggle to active mode. Recording Recording videos Press and hold the On/Off/Mode button [2] for at least 3 seconds to switch the camcorder on. The camcorder initialises in Video mode automatically English
31 Press the record button [9] to start recording. During recording the status LEDs [3, 11 and 15] will flash red and the status LED [6] orange. Press the record button [9] again to stop recording. The status LEDs [3, 11 and15] go off. Taking pictures Press and hold the On/Off/Mode button [2] for at least 3 seconds to switch the camcorder on. The camcorder initialises in Video mode automatically. To switch to Photo mode (PHOTO), press the On/Off/Mode button [2] once. Press the record button [9] to take a picture. While saving the status LED [3] goes green. Burst mode Press and hold the On/Off/Mode button [2] for at least 3 seconds to switch the camcorder on. The camcorder initialises in Video mode automatically. To switch to Burst mode (BURST), press the On/Off/Mode button [2] three times. Press the record button [9] to take a series of 10 pictures. While saving the status LED [3] goes green. Time-lapse mode Press and hold the On/Off/Mode button [2] for at least 3 seconds to switch the camcorder on. The camcorder initialises in Video mode automatically. To switch to Time-lapse mode (LAPSE), press the On/Off/Mode button [2] four times. Press the record button [9] to start recording. During recording the status LEDs [3, 11 and 15] will flash red and the status LED [6] orange. Press the record button [9] again to stop recording. The status LED [3] goes off. English - 29
32 Self-timer Press and hold the On/Off/Mode button [2] for at least 3 seconds to switch the camcorder on. The camcorder initialises in Video mode automatically. To switch to Self-timer mode (TIMER), press the On/Off/Mode button [2] five times. Press the record button [9] to enable the self-timer. After the self-timer has been enabled, the status LED [3] flashes slowly green/orange and the status LEDs [11, 15 and 6] flash slowly red or orange. The last seconds of the self-timer countdown the status LEDs [3, 6, 11 and 15] flash faster. The photo is taken 10 seconds after the self-timer is enabled. WiFi mode / Controlling the action camcorder from the App The "SilverCrest Action Camcorder" app lets you control your action camcorder from your smartphone or tablet PC. Proceed as follows: First install the "SilverCrest Action Camcorder app on your smartphone or tablet PC. You can download the app from the Apple App Store and from the Google Play Store. For ios devices and Android devices up to version 4.x, select the "SilverCrest Action Camcorder" app; for Android devices version 5.x and above, select the "SilverCrest Action Camcorder 2" app. In order for the app to be displayed on an Apple ipad in Apple App Store, select the "iphone only" filter. Enable the action camcorder WiFi mode: o Press and hold the On/Off/Mode button [2] for at least 3 seconds to switch the camcorder on. The camcorder initialises in Video mode automatically. o To switch to WiFi mode, press the On/Off/Mode button [2] twice. o Press the Record button (9) to enable WiFi. The display [1] reads "ON". To disable WiFi, press the Record button [9] again. The display [1] reads "OFF". o Press the On/Off/Mode button [2] to switch to a different operating mode. The action camcorder starts preparing the WiFi mode. As soon as the status LED [3] flashes, WiFi is ready. Please note that the WiFi mode is automatically disabled after switching the camcorder off and back on English
33 SilverCrest SCW 5 A2 Enable WiFi on your smartphone or tablet PC. Please also see the User Manual for your device. Have the smartphone or tablet PC search for any WiFi devices and select the "SCW5A1_" followed by a 6-digits number/character combination from the list of found WiFi devices. Enter the password " " and establish the connection. Next you can launch the "SilverCrest Action Camcorder" app on your smartphone or tablet PC and use it to control the action camcorder. You can download the operating instructions for your SilverCrest Action Camcorder App from the website. The menu The menu lets you customise the camcorder settings and record parameters. Press and hold the On/Off/Mode button [2] for at least 3 seconds to switch the camcorder on. The camcorder initialises in Video mode automatically. To open the menu, press the On/Off/Mode button [2] six times. Press the record button [9] to open the menu. The following menu is shown: Press the On/Off/Mode button [2] to select the desired icon or option. Press the record button [9] to confirm your selection. English - 31
34 Menu icons Customise recording settings To set the video resolution To select the camera s field of view To set the time-lapse delay To rotate the recording by 180 To toggle the loop recording mode on/off To toggle the diving mode on/off To delete recordings/format the memory card To exit the menu Customise camcorder settings To rotate the display image by 180 To toggle the status LEDs on/off To customise the display brightness To customise the beeper volume To customise the auto power-off delay To set the date and time To connect a remote control (not included in the package) To reset to factory defaults To exit the menu Record button [9] to confirm On/Off/Mode button [2] to select 32 - English
35 Setting the video resolution SilverCrest SCW 5 A2 The resolution determines the size of the recording in pixels. As a general rule: the higher the resolution, the more storage space is required. To set the video resolution, proceed as follows: Press the On/Off/Mode button [2] multiple times to select the SETUP menu and then press the record button [9] to confirm. The VIDEO menu will be highlighted. Press the record button [9] to open the VIDEO menu. Press the On/Off/Mode button [2] to select an option. The following settings are available: 1080p 1920 x 1080 (30 fps) 960p 1280 x 960 (30 fps) 720p 1280 x 720 (60 fps) Press the record button [9] to confirm your selection. To exit the SETUP menu, press the On/Off/Mode button [2] multiple times until the EXIT item is highlighted and then press the record button [9] to confirm. English - 33
36 Selecting the camera s field of view To select the camera s field of view, proceed as follows: Press the On/Off/Mode button [2] multiple times to select the SETUP menu and then press the record button [9] to confirm. Press the On/Off/Mode button [2] multiple times until the FOV menu is highlighted. Press the record button [9] to open the FOV menu. Press the On/Off/Mode button [2] to select an option. The following settings are available: Ultra wide-angle lens Wide-angle lens Press the record button [9] to confirm your selection. To exit the SETUP menu, press the On/Off/Mode button [2] multiple times until the EXIT item is highlighted and then press the record button [9] to confirm. The "Ultra" and "Wide" settings only apply to picture recordings. For video recordings, the setting will always be "Ultra" (independently of the selection made in the menu) English
37 Setting the time-lapse options To set the time-lapse options, proceed as follows: Press the On/Off/Mode button [2] multiple times to select the SETUP menu and then press the record button [9] to confirm. Press the On/Off/Mode button [2] multiple times until the LAPSE menu is highlighted. Press the record button [9] to open the LAPSE menu. Press the On/Off/Mode button [2] to select the desired option and then press the record button [9] to confirm. The following options are available: Use this menu to select to save the timelapse recording as a video or select to save it as a pictures series. Use this menu to select the recording interval. The following settings are available: 1 SEC (not for picture series), 3 SEC, 5 SEC, 10 SEC, 30 SEC and 60 SEC. Select this option to exit the LAPSE menu without making any changes. To exit the SETUP menu, press the On/Off/Mode button [2] multiple times until the EXIT item is highlighted and then press the record button [9] to confirm. English - 35
38 Rotating the recording by 180 In this menu you can have your videos and photos recordings rotated by 180. To enable it, proceed as follows: Press the On/Off/Mode button [2] multiple times to select the SETUP menu and then press the record button [9] to confirm. Press the On/Off/Mode button [2] multiple times until the UP/DOWN menu is highlighted. Press the record button [9] to open the UP/DOWN menu. Press the On/Off/Mode button [2] to select an option. The following settings are available: ON and OFF. Select ON to have your recording rotated by 180. Select OFF if you don t want to rotate the recordings. Press the record button [9] to confirm your selection. To exit the SETUP menu, press the On/Off/Mode button [2] multiple times until the EXIT item is highlighted and then press the record button [9] to confirm English
39 Toggling the loop recording mode on/off SilverCrest SCW 5 A2 This menu allows you to enable or disable the loop recording mode. Loop recording is only possible when storing the recordings on a memory card. Please note that this mode will overwrite existing data once the memory card is full. The oldest data is overwritten first. Proceed as follows to toggle this mode on or off: Press the On/Off/Mode button [2] multiple times to select the SETUP menu and then press the record button [9] to confirm. Press the On/Off/Mode button [2] multiple times until the LOOP menu is highlighted. Press the record button [9] to open the LOOP menu. Press the On/Off/Mode button [2] to select an option. The following settings are available: ON and OFF. Select "ON" to enable the loop recording mode or select "OFF" to disable it. Press the record button [9] to confirm your selection. As soon as loop recording has been enabled you can press the recording button [9] to start or stop recording. During loop recording the status indicator [15] flashes red. To be able to select a different recording mode you first have to disable loop recording. Also, in loop recording there are only a few setup options available. To exit the SETUP menu, press the On/Off/Mode button [2] multiple times until the EXIT item is highlighted and then press the record button [9] to confirm. English - 37
40 Toggling the diving mode on/off This menu allows you to enable or disable the diving mode. You can enable the diving mode while using the device underwater in order to obtain optimised image parameters. Proceed as follows: Press the On/Off/Mode button [2] multiple times to select the SETUP menu and then press the record button [9] to confirm. Press the On/Off/Mode button [2] multiple times until the DIVING menu is highlighted. Press the record button [9] to open the DIVING menu. Press the On/Off/Mode button [2] to select an option. The following settings are available: ON and OFF. Select "ON" to enable the diving mode or select "OFF" to disable it. Press the record button [9] to confirm your selection. Once you have enabled the diving mode, only video and photo recording is available. To be able to select a different recording mode you first have to disable the diving mode. Also, in diving mode there are only a few setup options available. To exit the SETUP menu, press the On/Off/Mode button [2] multiple times until the EXIT item is highlighted and then press the record button [9] to confirm English
41 Deleting recordings/formatting the memory card SilverCrest SCW 5 A2 WARNING: During deleting/formatting all movies and pictures saved will be deleted and cannot be restored. Make sure that all recordings you want to keep have been backed up to a different medium. To delete videos or photos from the internal memory or to format the internal memory, you first have to remove the memory card (if one is inserted). This menu lets you delete any recordings or format the memory card or internal memory. Proceed as follows: Press the On/Off/Mode button [2] multiple times to select the SETUP menu and then press the record button [9] to confirm. Press the On/Off/Mode button [2] multiple times until the DELETE menu is highlighted. Press the record button [9] to open the DELETE menu. Press the On/Off/Mode button [2] to select an option. The following options are available: Erases the last-recorded video or photo. Erases all files stored on the memory card or the internal memory. English - 39
42 Formats the memory card or internal memory. Press the record button [9] to confirm your selection. You ll need to confirm the deleting/formatting once again. If you want, you can also cancel this process. Press the On/Off/Mode button [2] to select an option. The following options are available: Confirm (DELETE or FORMAT) Cancel (EXIT) Press the record button [9] to confirm your selection. To exit the DELETE menu, press the On/Off/Mode button [2] multiple times until the EXIT item is highlighted and then press the record button [9] to confirm. To exit the SETUP menu, press the On/Off/Mode button [2] multiple times until the EXIT item is highlighted and then press the record button [9] to confirm English
43 Rotating the display image by 180 This menu allows you to rotate the display image by 180. Proceed as follows: Press the On/Off/Mode button [2] multiple times to select the MORE menu and then press the record button [9] to confirm. The UP/DOWN menu will be highlighted. Press the record button [9] to open the UP/DOWN menu. Press the On/Off/Mode button [2] to select an option. The following settings are available: and. Select to restore the default value. Use the setting to rotate the display image by 180. Press the record button [9] to confirm your selection. To exit the MORE menu, press the On/Off/Mode button [2] multiple times until the EXIT item is highlighted and then press the record button [9] to confirm. English - 41
44 Toggling the status LEDs on/off This menu allows you to enable or disable the camcorder s status LEDs. Proceed as follows: Press the On/Off/Mode button [2] multiple times to select the MORE menu and then press the record button [9] to confirm. Press the On/Off/Mode button [2] multiple times until the LED menu is highlighted. Press the record button [9] to open the LED menu. Press the On/Off/Mode button [2] to select an option. The following settings are available: ON and OFF. Selecting ON will enable the camcorder s status LEDs and selecting OFF will disable them. Press the record button [9] to confirm your selection. To exit the MORE menu, press the On/Off/Mode button [2] multiple times until the EXIT item is highlighted and then press the record button [9] to confirm. The status LED [6] will flash orange during battery charging even if the status LEDs have been switched off English
45 Customising the display brightness SilverCrest SCW 5 A2 This menu allows you to customise the display brightness. Proceed as follows: Press the On/Off/Mode button [2] multiple times to select the MORE menu and then press the record button [9] to confirm. Press the On/Off/Mode button [2] multiple times until the BRIGHT menu is highlighted. Press the record button [9] to open the BRIGHT menu. Press the On/Off/Mode button [2] to select an option. The following settings are available: 100 %, 60 % and 30 %. You can adjust the display brightness in three levels (100 % = bright to 30 % = dark). Press the record button [9] to confirm your selection. To exit the MORE menu, press the On/Off/Mode button [2] multiple times until the EXIT item is highlighted and then press the record button [9] to confirm. English - 43
46 Customising the beeper volume This menu allows you to customise the beeper volume. Proceed as follows: Press the On/Off/Mode button [2] multiple times to select the MORE menu and then press the record button [9] to confirm. Press the On/Off/Mode button [2] multiple times until the BEEP menu is highlighted. Press the record button [9] to open the BEEP menu. Press the On/Off/Mode button [2] to select an option. The following settings are available: Sets the beeper volume to the highest value. Sets the beeper volume to a middle value. Disables the beeper. Press the record button [9] to confirm your selection. To exit the MORE menu, press the On/Off/Mode button [2] multiple times until the EXIT item is highlighted and then press the record button [9] to confirm English
47 Customising the auto power-off delay This menu allows you to customise the automatic power-off delay. You can get the camcorder to power off automatically after a certain time to save battery. If no buttons are pressed during the preset time, the camcorder powers off automatically. To adjust the automatic power-off delay, proceed as follows: Press the On/Off/Mode button [2] multiple times to select the MORE menu and then press the record button [9] to confirm. Press the On/Off/Mode button [2] multiple times until the AUTO OFF menu is highlighted. Press the record button [9] to open the AUTO OFF menu. Press the On/Off/Mode button [2] to select an option. The following settings are available: 1 MIN, 3 MIN, 5 MIN, 10 MIN, 30 MIN, 60 MIN and OFF. Select a delay time after which the camcorder powers off automatically if no operation has been made in the meantime. Select OFF to disable the auto power-off function. Press the record button [9] to confirm your selection. To exit the MORE menu, press the On/Off/Mode button [2] multiple times until the EXIT item is highlighted and then press the record button [9] to confirm. English - 45
48 Setting the date and time This lets you set the date and time. Proceed as follows: Press the On/Off/Mode button [2] multiple times to select the MORE menu and then press the record button [9] to confirm. Press the On/Off/Mode button [2] multiple times until the TIME menu is highlighted. Press the record button [9] to open the TIME menu. Next you can set the year, month, day, hours and minutes in sequence. Press the record button [9] to increase the value stepwise. Press the On/Off/Mode button [2] to confirm each entry. After all settings have been entered, press the On/Off/Mode button [2] to select OK. Press the record button [9] to confirm. To exit the MORE menu, press the On/Off/Mode button [2] multiple times until the EXIT item is highlighted and then press the record button [9] to confirm English
49 Connecting a remote control (not included in the package) This menu lets you connect a remote control (not supplied) to your camcorder. The following section describes how to establish a connection with the standard remote control. Please also see the remote control User Manual. A remote control lets you start or stop video recordings and take pictures. You can order the remote control and consumables like adhesive pads from our hotline or by (see page 77). To connect the remote control to the camcorder, proceed as follows: Press the On/Off/Mode button [2] multiple times to select the MORE menu and then press the record button [9] to confirm. Press the On/Off/Mode button [2] multiple times until the BINDING menu is highlighted. Press the record button [9] to open the BINDING menu. The camcorder will start seeking the remote control for 30 seconds and indicates it on the display [1] as follows: Within the next 30 seconds, press both buttons (Video and Photo button) on the remote control English - 47
50 After the remote control has been successfully connected to the camcorder the red remote control LED will light up shortly. To exit the MORE menu, press the On/Off/Mode button [2] multiple times until the EXIT item is highlighted and then press the record button [9] to confirm. You can now control your camcorder via the remote control. Press the [circle icon] button on the remote control to start or stop a video recording. Press the [camera icon] button on the remote control to take a picture. You can wear the remote control comfortably like a watch on your wrist giving you convenience and flexibility for all your activities. To control photography via the remote control you first have to set the camcorder to the desired mode (Photo, Burst, Time-lapse or Self-timer). To use the remote control to record videos, set the camcorder to Video mode. In Video mode you can even take picture by pressing the [camera icon] button on the remote control. The remote control is water-resistant up to a depth of 60 m. To guarantee its waterresistance, do not use the remote control for longer than 60 minutes under water at a time. The water-resistance applies to salt and fresh water only. It does not apply to any cleaners, chemicals, solvents or water in public swimming pools. Liquids of this kind must be wiped off the remote control immediately. Only use the remote control in water of temperatures of between 0 C and 35 C. Besides the standard remote control you can also use a remote control with display and additional features English
51 Resetting to factory defaults SilverCrest SCW 5 A2 In this menu you can restore the factory-default settings of your camcorder. Proceed as follows: Press the On/Off/Mode button [2] multiple times to select the MORE menu and then press the record button [9] to confirm. Press the On/Off/Mode button [2] multiple times until the DEFAULT menu is highlighted. Press the record button [9] to open the DEFAULT menu. You ll have to confirm the factory reset. If you want, you can also cancel this process. Press the On/Off/Mode button [2] to select an option. The following options are available: Confirm (reset to factory defaults) Cancel (EXIT) Press the record button [9] to confirm your selection. To exit the MORE menu, press the On/Off/Mode button [2] multiple times until the EXIT item is highlighted and then press the record button [9] to confirm. English - 49
52 Connecting a microphone For best-quality audio recording you can connect an external microphone with 2.5mm jacktype connector to the camcorder s microphone jack [14]. If necessary, you can use an adapter. The internal microphone of your camcorder will be disabled automatically when you connect an external microphone. Viewing recordings on a television You can view your recordings on a television. The television needs to have an HDMI connector. Use the HDMI cable to connect the camcorder to an available HDMI port on a TV. Insert the small plug of the supplied HDMI cable into the HDMI port [8] of your camcorder and the large plug into a HDMI port on your TV. Power on your TV and select the HDMI input where your camcorder is connected to. Press and hold the On/Off/Mode button [2] for at least 3 seconds to switch the camcorder on. The camcorder initialises and the display indicates PLAYBACK, and after a few seconds the TV screen will show the following picture: 50 - English
53 Mode Battery capacity Memory card SilverCrest SCW 5 A2 Type of recording Recordings thumbnail view Mode Shows the current operating mode. Shows the recordings in thumbnail view. Plays back the recording (photo or video). Battery capacity Shows the remaining battery level of your camcorder. English - 51
54 Memory card This icon indicates whether a memory card has been inserted or not. The icon is white if a memory card has been inserted and grey if not. If there is no memory card inserted, the contents of the internal memory is played back. Type of recording Here you can select what recordings shall be shown in thumbnail view. Press the On/Off/Mode button [2] to toggle between the options. The following options are available: Show video recordings only Show photo recordings only Show loop recordings only Show all recordings Press the record button [9] to select a recording type. Recordings thumbnail view This displays the recordings in thumbnail view. Press the On/Off/Mode button [2] to highlight a recording. The highlighted recording appears with a frame in thumbnail view. If you have highlighted a video, its resolution will also be indicated on the left. Press the record button [9] to show the highlighted video or picture in full-screen mode. Press the On/Off/Mode button [2] to toggle between the recordings in fullscreen view. Press the record button [9] to start playing back a video. Press the record button [9] during video playback or in picture fullscreen mode to toggle to the video/photo/loop/all selection. Next you can use the On/Off/Mode button [2] to toggle between video only, photo only or loop recordings only display mode English
55 Transferring recordings to a computer There are two ways of copying recordings from the camcorder to a computer: by connecting the camcorder to a computer via the USB cable by inserting the memory card into a card reader Be careful when renaming any folders and files. Do NOT try to change the folder or file names stored on the device from the computer or you may not be able to read any files contained here on your camcorder. Once you have copied your files or folders to the computer, you can rename or edit them on the computer. Connecting the camcorder to a computer Use the USB cable to connect the camcorder to an available USB port on a computer. Insert the small plug of the supplied USB cable into the USB/charge port of your camcorder [13] and the large plug into a USB port on your computer. Switch the camcorder on (if it is powered off). The computer will now setup removable drives (or the internal memory and the memory card) where you can access your recordings. Please note that it's not possible to make changes to your recording while the device runs in this mode. Therefore it's not possible to change, delete or rename the files. You will only be able to copy the files. English - 53
56 Using a card reader If your computer has a card reader which is compatible with microsd or SD memory cards, you can read the contents of the memory card directly. Remove the memory card from the camcorder while it is switched off. Insert the microsd card directly into the microsd card reader or into the SD card adapter. If you are using the SD card adapter, insert it into the SD card reader on your computer (normally labelled SD/MMC). The PC will add the memory card contents under the drive letter representing the card reader in My Computer. Open My Computer on your PC and double-click on the drive representing the card reader. All recorded files can be found in a subfolder of the folder DCIM on this drive. Now you can copy the recorded files from the camcorder into a folder of your choice on the computer s hard disk. Write-protecting the SD card adapter The SD card adapter comes with a write protection tab. When write-protection is enabled (see the figure below right) you can only view existing videos and pictures, not delete or edit them. Write-protection disabled Write-protection enabled Disable the write-protection (see the figure above left) if you want to delete or edit any videos or pictures. Then reinsert the SD card adapter into the SD card reader on your computer English
GUIDELINES FOR CONNECTION TO FTP SERVER TO TRANSFER PRINTING DATA
 GUIDELINES FOR CONNECTION TO FTP SERVER TO TRANSFER PRINTING DATA What is an FTP client and how to use it? FTP (File transport protocol) - A protocol used to transfer your printing data files to the MAFRAPRINT
Lenovo A5000. Quick Start Guide v1.0. English/Česky
 Lenovo A5000 Quick Start Guide v1.0 English/Česky English Read this guide carefully before using your smartphone. Learning more Getting support Electronic emission notices To learn more information about
User manual SŘHV Online WEB interface for CUSTOMERS June 2017 version 14 VÍTKOVICE STEEL, a.s. vitkovicesteel.com
 1/ 11 User manual SŘHV Online WEB interface for CUSTOMERS June 2017 version 14 2/ 11 Contents 1. MINIMUM SYSTEM REQUIREMENTS... 3 2. SŘHV ON-LINE WEB INTERFACE... 4 3. LOGGING INTO SŘHV... 4 4. CONTRACT
UPM3 Hybrid Návod na ovládání Čerpadlo UPM3 Hybrid 2-5 Instruction Manual UPM3 Hybrid Circulation Pump 6-9
 www.regulus.cz UPM3 Hybrid Návod na ovládání Čerpadlo UPM3 Hybrid 2-5 Instruction Manual UPM3 Hybrid Circulation Pump 6-9 CZ EN UPM3 Hybrid 1. Úvod V továrním nastavení čerpadla UPM3 Hybrid je profil PWM
WL-5480USB. Quick Setup Guide
 Quick Setup Guide 1 Czech 7 Install Utility Software Note1: Before installing the utility software, DO NOT inserts the into your computer. If the adapter is inserted already, Windows will detect the adapter
2N Voice Alarm Station
 2N Voice Alarm Station 2N Lift1 Installation Manual Version 1.0.0 www.2n.cz EN Voice Alarm Station Description The 2N Voice Alarm Station extends the 2N Lift1/ 2N SingleTalk with an audio unit installed
Lenovo A606. Quick Start Guide v1.0. English/Česky
 Lenovo A606 Quick Start Guide v1.0 English/Česky English Read this guide carefully before using your smartphone. Learning more Getting support Electronic emission notices To learn more information about
Quick Start Guide. Clear. Rychlý průvodce nastavením
 CZ EN Quick Start Guide Clear Rychlý průvodce nastavením Measurement Měření Před Fully prvním charge použitím the blood plně pressure dobijte monitor baterii before přístroje. first use. 1 Rest your bare
 If there is any inconsistency of weather forecast between Local Weather Station and this unit, the Local Weather Station's forecast should prevail. The trend pointer displayed on the LCD indicates the
2N LiftIP. Voice Alarm Station. Communicator for Lifts. Version
 2N LiftIP Communicator for Lifts Voice Alarm Station Version 2.4.0 www.2n.cz Description The 2N Voice Alarm Station is a switch that helps you extend 2N LiftIP with one or more audio units installed on
1080 WIFI Kamerový modul. ( vhodný pro iphone / android / stolní počítač)
") 1080 WIFI Kamerový modul ( vhodný pro iphone / android / stolní počítač) 5 Provozní pokyny pro WIFI vzdálenou monitorovací kamerovou jednotku 1. Struktura produktu 2. Kamera zapnutí ON (2 způsoby zapnutí)
1080 WIFI Kamerový modul ( vhodný pro iphone / android / stolní počítač) 5 Provozní pokyny pro WIFI vzdálenou monitorovací kamerovou jednotku 1. Struktura produktu 2. Kamera zapnutí ON (2 způsoby zapnutí)
USER'S MANUAL FAN MOTOR DRIVER FMD-02
 USER'S MANUAL FAN MOTOR DRIVER FMD-02 IMPORTANT NOTE: Read this manual carefully before installing or operating your new air conditioning unit. Make sure to save this manual for future reference. FMD Module
UŽIVATELSKÁ PŘÍRUČKA
 UŽIVATELSKÁ PŘÍRUČKA Plni víry a naděje míříme kupředu. S odhodláním zlepšujeme své dovednosti. Zapomeňte na zklamání, ale nikoli na svůj nevyužitý potenciál. Touha překonat sám sebe a dosáhnout hranice
Mechanika Teplice, výrobní družstvo, závod Děčín TACHOGRAFY. Číslo Servisní Informace Mechanika: 5-2013
 Mechanika Teplice, výrobní družstvo, závod Děčín TACHOGRAFY Servisní Informace Datum vydání: 20.2.2013 Určeno pro : AMS, registrované subj.pro montáž st.měř. Na základě SI VDO č./datum: Není Mechanika
Litosil - application
 Litosil - application The series of Litosil is primarily determined for cut polished floors. The cut polished floors are supplied by some specialized firms which are fitted with the appropriate technical
Microsoft Lync WEB meeting
 User - documentation ENU and CZ version Microsoft Lync WEB meeting - Připojení k WEB meetingu prostřednictvím Microsoft Lync Date: 10. 5. 2013 Version: 0.2 ENU, CZ www.axiomprovis.cz Version description:
SPECIFICATION FOR ALDER LED
 SPECIFICATION FOR ALDER LED MODEL:AS-D75xxyy-C2LZ-H1-E 1 / 13 Absolute Maximum Ratings (Ta = 25 C) Parameter Symbol Absolute maximum Rating Unit Peak Forward Current I FP 500 ma Forward Current(DC) IF
Introduction to MS Dynamics NAV
 Introduction to MS Dynamics NAV (Item Charges) Ing.J.Skorkovský,CSc. MASARYK UNIVERSITY BRNO, Czech Republic Faculty of economics and business administration Department of corporate economy Item Charges
ADDRESS CONVERSION TABLE FOR MANUAL SETTING
 - (06-57) - ADDRESS CVERSI TABLE FOR MANUAL SETTING In the case of a multiple refrigerant system, each refrigerant system should be set an exclusive refrigerant. Conversion table of refrigerant and rotary
obal manuálu, asi něco podobného jako u LC 100 asi by to chtělo lepší obrázek!!! FYTOSCOPE FS130 Instruction Guide
 obal manuálu, asi něco podobného jako u LC 100 asi by to chtělo lepší obrázek!!! FYTOSCOPE FS130 Instruction Guide možná tohle trochu zmenšit a dát sem i to varování LED RADIATION co je na další straně
Připojení internetového modulu econet300 Do regulátoru ecomax 810P3-L TOUCH.
 Připojení internetového modulu econet300 Do regulátoru ecomax 810P3-L TOUCH. Connection of econet300 internet module to ecomax 810P3-L TOUCH Controller. Prosím ověřte verzi softwaru vašeho modulu ecomax.
Progressive loyalty V1.0. Copyright 2017 TALENTHUT
 Progressive loyalty Copyright 2017 TALENTHUT www.talenthut.io 1. Welcome The Progressive Loyalty Siberian CMS module will allow you to launch a loyalty program and reward your customers as they buy from
1. Connect one end of the HDMI cable to the VENZ box and the other end to a free HDMI port on your TV.
 V10 V10 PRO V12 ULTRA ANDROID Firmware manual English / Čeština Packaging content / Obsah balení 1. VENZ TV BOX 2. POWER ADAPTER / NAPÁJECÍ ADAPTÉR 3. HDMI CABLE / HDMI KABEL 4. REMOTE CONTROL / DÁLKOVÝ
Plantronics Explorer 50. Návod k obsluze
 Plantronics Explorer 50 Návod k obsluze Obsah Vítejte 3 Obsah balení 4 Přehled náhlavní soupravy 5 Buďte opatrní 5 Pair and Charge 6 Get Paired 6 Activate pair mode 6 Use two phones 6 Reconnect 6 Charge
 11.12. 100 ΕΙΣΟΔΟΣ = E / ENTRANCE = E = = 1174 550 ΤΥΠΟΠΟΙΗΜΕΝΟ ΚΥ = 2000 (ΕΠΙΛΟΓΗ: 2100) / CH STANDARD = 2000 (OPTIONAL: 2100) 243 50 ΚΥ/CH + 293 ΚΥ/CH +103 100 ΚΥ /CH 6 11 6 20 100 0,25 ΚΑ (CO) + 45
2N LiftIP. IO Extender. Communicator for Lifts. Version
 2N LiftIP Communicator for Lifts IO Extender Version 2.4.0 www.2n.cz Description The IO extender helps you extend 2N LiftIP with 1 input and 2 outputs. The purpose of the input is to cancel the rescue
Tento materiál byl vytvořen v rámci projektu Operačního programu Vzdělávání pro konkurenceschopnost.
 Tento materiál byl vytvořen v rámci projektu Operačního programu Vzdělávání pro konkurenceschopnost. Projekt MŠMT ČR Číslo projektu Název projektu školy Klíčová aktivita III/2 EU PENÍZE ŠKOLÁM CZ.1.07/1.4.00/21.2146
 [KLICK] GB Instruction Manual POWERLINE 4 LIGHT FOREWORD Dear Customer, Thank you for purchasing the POWERLINE 4 LIGHT charger. These operating instructions will help you to get the best from your charger.
Gymnázium a Střední odborná škola, Rokycany, Mládežníků 1115
 Číslo projektu: Číslo šablony: Název materiálu: Gymnázium a Střední odborná škola, Rokycany, Mládežníků 1115 CZ.1.07/1.5.00/34.0410 II/2 Parts of a computer IT English Ročník: Identifikace materiálu: Jméno
ROLZ-2. Portable AV/Conference Center. Assembly Instructions
 1 ROLZ-2 Portable AV/Conference Center Assembly Instructions Rolz-2 Portable AV/Conference Center Part Drawing Description Qty Part Drawing Description Qty Hardware List A 1 ½ Flat Head Screw 2 EA P-1
Amp1.
 Amp1 www.evolveo.com Vážený zákazníku, děkujeme, že jste si vybral produkt EVOLVEO Amp 1. Adaptér: DC 5 V 550 ma AC 220-240 V Funkce zesilovače: Zesílení přijímaného signálu až o 20dB pro všechny pasivní
FIRE INVESTIGATION. Střední průmyslová škola Hranice. Mgr. Radka Vorlová. 19_Fire investigation CZ.1.07/1.5.00/
 FIRE INVESTIGATION Střední průmyslová škola Hranice Mgr. Radka Vorlová 19_Fire investigation CZ.1.07/1.5.00/34.0608 Výukový materiál Číslo projektu: CZ.1.07/1.5.00/21.34.0608 Šablona: III/2 Inovace a zkvalitnění
WYSIWYG EDITOR PRO XML FORM
 WYSIWYG EDITOR PRO XML FORM Ing. Tran Thanh Huan, Ing. Nguyen Ba Nghien, Doc. Ing. Josef Kokeš, CSc Abstract: In this paper, we introduce the WYSIWYG editor pro XML Form. We also show how to create a form
Uživatelská příručka. Xperia P TV Dock DK21
 Uživatelská příručka Xperia P TV Dock DK21 Obsah Úvod...3 Přehled zadní strany stanice TV Dock...3 Začínáme...4 Správce LiveWare...4 Upgradování aplikace Správce LiveWare...4 Použití stanice TV Dock...5
TechoLED H A N D B O O K
 TechoLED HANDBOOK Světelné panely TechoLED Úvod TechoLED LED světelné zdroje jsou moderním a perspektivním zdrojem světla se širokými možnostmi použití. Umožňují plnohodnotnou náhradu žárovek, zářivkových
Gymnázium, Brno, Slovanské nám. 7 WORKBOOK. Mathematics. Teacher: Student:
 WORKBOOK Subject: Teacher: Student: Mathematics.... School year:../ Conic section The conic sections are the nondegenerate curves generated by the intersections of a plane with one or two nappes of a cone.
Hi-Res Audio/DNC Headset MDR-NC750
 Uživatelská příručka Hi-Res Audio/DNC Headset MDR-NC750 Obsah Začínáme...3 Úvod...3 Přehled... 3 Základy práce...4 Nošení náhlavní soupravy...4 Připojení náhlavní soupravy k vašemu zařízení... 4 Nastavení
CZ.1.07/1.5.00/
 Projekt: Příjemce: Digitální učební materiály ve škole, registrační číslo projektu CZ.1.07/1.5.00/34.0527 Střední zdravotnická škola a Vyšší odborná škola zdravotnická, Husova 3, 371 60 České Budějovice
Postup objednávky Microsoft Action Pack Subscription
 Postup objednávky Microsoft Action Pack Subscription DŮLEŽITÉ: Pro objednání MAPS musíte být členem Microsoft Partner Programu na úrovni Registered Member. Postup registrace do Partnerského programu naleznete
MultiPort 1.
 MultiPort 1 www.evolveo.com CZ ÚVOD Děkujeme, že jste si zakoupili dokovací stanici USB-C EVOLVEO Multiport 1. Tento výrobek vám umožní připojit 2. monitor přímo přes HDMI nebo VGA konektor. Rozlišení
PC/104, PC/104-Plus. 196 ept GmbH I Tel. +49 (0) / I Fax +49 (0) / I I
 / I Fax +49 (0) / I I") E L E C T R O N I C C O N N E C T O R S 196 ept GmbH I Tel. +49 (0) 88 61 / 25 01 0 I Fax +49 (0) 88 61 / 55 07 I E-Mail sales@ept.de I www.ept.de Contents Introduction 198 Overview 199 The Standard 200
E L E C T R O N I C C O N N E C T O R S 196 ept GmbH I Tel. +49 (0) 88 61 / 25 01 0 I Fax +49 (0) 88 61 / 55 07 I E-Mail sales@ept.de I www.ept.de Contents Introduction 198 Overview 199 The Standard 200
USER'S MANUAL FAN MOTOR DRIVER FMD-01, FMD-03
 USER'S MANUAL FAN MOTOR DRIVER FMD-01, FMD-03 IMPORTANT NOTE: Read this manual carefully before installing or operating your new air conditioning unit. Make sure to save this manual for future reference.
AIC ČESKÁ REPUBLIKA CZECH REPUBLIC
 ČESKÁ REPUBLIKA CZECH REPUBLIC ŘÍZENÍ LETOVÉHO PROVOZU ČR, s.p. Letecká informační služba AIR NAVIGATION SERVICES OF THE C.R. Aeronautical Information Service Navigační 787 252 61 Jeneč A 1/14 20 FEB +420
EXACT DS OFFICE. The best lens for office work
 EXACT DS The best lens for office work EXACT DS When Your Glasses Are Not Enough Lenses with only a reading area provide clear vision of objects located close up, while progressive lenses only provide
On-line datový list SAS4-F028P3PS2T00 SLG SPÍNACÍ SVĚTELNÉ MŘÍŽE PRO AUTOMATIZAČNÍ TECHNIKU
 On-line datový list SAS4-F08PPST00 SLG SAS4-F08PPST00 SLG A B C D E F H I J K L N O P R S T Technická data v detailu Vlastnosti Technologie Objednací informace Typ Výrobek č. SAS4-F08PPST00 077 další provedení
Get started Začínáme Začíname
 Get started Začínáme Začíname Get started Začínáme Začíname 1 Insert the included AA batteries before proceeding with the installation. Před zahájením instalace vložte přiložené baterie AA. Pred začatím
Jak importovat profily do Cura (Windows a
 Jak importovat profily do Cura (Windows a macos) Written By: Jakub Dolezal 2019 manual.prusa3d.com/ Page 1 of 10 Step 1 Stažení Cura profilů V tomto návodu se dozvíte, jak importovat a aktivovat nastavení
Pokyny k použití. Model-300. Napájecí zdroj. Návod na obsluhu Operating Instructions. se systémem Aquacontrol Napájací zdroj
 Pokyny k použití Model-300 Návod na obsluhu Operating Instructions Napájecí zdroj se systémem Napájací zdroj so systémom Power Supply with System BK 0011900 / PC AQUACONTROL Kryt aquacontrol Kryt aquacontrol
CZ EN SK. U-Smart. WiFi Desk Lamp
 CZ EN SK U-Smart WiFi Desk Lamp U-Smart WiFi Desk Lamp CZ časovač EN timer SK časovač CZ tlačítko M EN M button SK tlačidlo M CZ tlačítko ON/OFF EN ON/OFF button SK tlačidlo ON/OFF CZ Kliknutím na tlačítko
:= = := :=.. := := := := ρ := := α := π α = α = := = :=
 := = := :=.. := := := := ρ := := α := π α = α = := = := := α := α := = := α := := α = = ρ ρ := := := = := = := := := + + := + + := + := := := := + + := + + := + = = = :=.. := η := η := := π = :=.. :=,
Popis tlačítek a funkcí: Dálkový ovladač: CZ - 2
 NÁVOD K POUŽITÍ CD/Radio přehrávač NÁVOD NA POUŽITIE Radio/CD prehrávač INSTRUCTION MANUAL CD/Radio player Popis tlačítek a funkcí: 1) Hlavní vypínač: krátký stisk zapne přístroj, opětovný krátký stisk
Size / Světlost : DN 1/4 to 4 / DN 1/4 až 4
 Size / Světlost : 1/4 to 4 / 1/4 až 4 Ends / Konce : Threaded BSP / Závitové BSP Min. Temperature / Minimální teplota : -20 C Max. Temperature / Maximální teplota : +180 C Max. Pressure / Maximální tlak
Projekt: ŠKOLA RADOSTI, ŠKOLA KVALITY Registrační číslo projektu: CZ.1.07/1.4.00/21.3688 EU PENÍZE ŠKOLÁM
 ZÁKLADNÍ ŠKOLA OLOMOUC příspěvková organizace MOZARTOVA 48, 779 00 OLOMOUC tel.: 585 427 142, 775 116 442; fax: 585 422 713 email: kundrum@centrum.cz; www.zs-mozartova.cz Projekt: ŠKOLA RADOSTI, ŠKOLA
English... 2. Čeština... 22. Deutsch... 41
 English... 2 Čeština... 22 Deutsch... 41 V 1.22 Table of Contents Trademarks... 4 Introduction... 4 Intended use... 4 Package contents... 5 Technical specifications... 5 Safety instructions... 6 Copyright...
CZ EN SK U-Smart. WiFi Plug Mini
 CZ EN SK U-Smart WiFi Plug Mini U-Smart / Android & ios CZ Vytvořte si účet EN Create an account SK Vytvorte si účet U-Smart WiFi Plug Mini CZ Klikněte na +. Klikněte na U-Smart WiFi Plug Mini. EN Click
2N Lift8 Audio unit machine room
 2N Lift8 Audio unit machine room Brief Manual Version 3.0.0 www.2n.cz The machine room audio unit is intended for installation in the machine room or as an intercom solution located in the reception.
DATA SHEET. BC516 PNP Darlington transistor. technický list DISCRETE SEMICONDUCTORS Apr 23. Product specification Supersedes data of 1997 Apr 16
 zákaznická linka: 840 50 60 70 DISCRETE SEMICONDUCTORS DATA SHEET book, halfpage M3D186 Supersedes data of 1997 Apr 16 1999 Apr 23 str 1 Dodavatel: GM electronic, spol. s r.o., Křižíkova 77, 186 00 Praha
Mobilní počítač Dolphin TM 6100. Stručný návod k použití
 Mobilní počítač Dolphin TM 6100 Stručný návod k použití Mobilní počítač Dolphin 6100 Pro začátek Ověřte si, že balení obsahuje následující položky: Mobilní počítač Dolphin 6100 (terminál) Hlavní bateriový
Střední průmyslová škola strojnická Olomouc, tř.17. listopadu 49
 Střední průmyslová škola strojnická Olomouc, tř.17. listopadu 49 Výukový materiál zpracovaný v rámci projektu Výuka moderně Registrační číslo projektu: CZ.1.07/1.5.00/34.0205 Šablona: III/2 Anglický jazyk
CCD 90 MV Cameras (Firewire) CCD 90 MV Cameras (GigE) CCD 90 MV Cameras (USB 2.0)
 CCD 90 MV Cameras (GigE) CCD 90 MV Cameras (USB 2.0)") CCD 90 MV Cameras (Firewire) PL-B952F-R PL-B953F-R PL-B954F-R PL-B954HF-R PL-B955F-R PL-B955HF-R PL-B956F-R PL-B957F-R PL-B958F-R PL-B959F-R CCD 90 MV Cameras (GigE) PL-B954G-R PL-B954HG-R PL-B955G-R PL-B955HG-R
CCD 90 MV Cameras (Firewire) PL-B952F-R PL-B953F-R PL-B954F-R PL-B954HF-R PL-B955F-R PL-B955HF-R PL-B956F-R PL-B957F-R PL-B958F-R PL-B959F-R CCD 90 MV Cameras (GigE) PL-B954G-R PL-B954HG-R PL-B955G-R PL-B955HG-R
Automatika na dávkování chemie automatic dosing
 Automatika na dávkování chemie automatic dosing Swimmingpool Technology Autodos 700 Automatické dávkování Autodos Autodos automatic dosing Autodos 700 je jedno-kanálové zaøízení, pro mìøení a dávkování.
Uživatelská příručka. USB Charger UCH20
 Uživatelská příručka USB Charger UCH20 Obsah Úvod...3 USB Charger popis... 3 Používání nabíječky USB... 4 Nabíjení zařízení... 4 Právní informace... 5 Declaration of Conformity...6 2 Úvod USB Charger popis
Název společnosti: VPK, s.r.o. Vypracováno kým: Ing. Michal Troščak Telefon: Datum:
 Pozice Počet Popis 1 SCALA2 3-45 A Datum: 2.7.217 Výrobní č.: 98562862 Grundfos SCALA2 is a fully integrated, self-priming, compact waterworks for pressure boosting in domestic applications. SCALA2 incorporates
NÁVOD NA OBSLUHU AKTUALIZACE SW
 ohřev větrání chlazení podlahové VERZE 17.12 TUV objektů objektů vytápění Opatrně vyjměte z instalačního rámečku. V horní části je plastová aretace. Carefully remove the installation frame. In the upper
Buderus System Logatherm Wps K
 Buderus System Logatherm Wps K XV1100K(C)/XV1100SK(C) All rights reserverd. Any reprinting or unauthorized use wihout the written permission of Buderus System Logatherm Wps K Corporation, is expressly
4Ever H A N D B O O K
 4Ever HANDBOOK Kancelářský systém 4Ever Úvod Základními stavebními komponenty podnoží jsou bočnice a podélné nosníky. Bočnice je tvořena nohami čtvercového průřezu 45 x 45 mm, spojovacím vodorovným bočním
GENERAL INFORMATION MATCH: ALSA PRO ARENA MASTERS DATE: TIME SCHEDULE:
 GENERAL INFORMATION MATCH: ALSA PRO ARENA MASTERS DATE: 22.9. - 23.9.2018 TIME SCHEDULE: Mainmatch 1 - Saturday 22.9. registration: 22.9.2018-9.00h first shot: 22.9.2018-10.00h Mainmatch 2 - Sunday 23.9.
2N Lift8 Audio unit shaft
 2N Lift8 Audio unit shaft Brief Manual Version 3.0.0 www.2n.cz This audio unit is designed for installation on the lift shaft bottom or lift cabin roof, or wherever it is necessary to communicate (during
English... 2. Čeština... 24. Deutsch... 46
 English... 2 Čeština... 24 Deutsch... 46 V 1.25 Table of Contents Trademarks... 4 Introduction... 4 Intended use... 4 Package contents... 5 Technical specifications... 6 Safety instructions... 7 Copyright...
VY_32_INOVACE_06_Předpřítomný čas_03. Škola: Základní škola Slušovice, okres Zlín, příspěvková organizace
 VY_32_INOVACE_06_Předpřítomný čas_03 Autor: Růžena Krupičková Škola: Základní škola Slušovice, okres Zlín, příspěvková organizace Název projektu: Zkvalitnění ICT ve slušovské škole Číslo projektu: CZ.1.07/1.4.00/21.2400
Czech Republic. EDUCAnet. Střední odborná škola Pardubice, s.r.o.
 Czech Republic EDUCAnet Střední odborná škola Pardubice, s.r.o. ACCESS TO MODERN TECHNOLOGIES Do modern technologies influence our behavior? Of course in positive and negative way as well Modern technologies
Progressive loyalty V1.2. Copyright 2017 TALENTHUT
 Progressive loyalty Copyright 2017 TALENTHUT www.talenthut.io 1. Welcome The Progressive Loyalty Siberian CMS module will allow you to launch a loyalty program and reward your customers as they buy from
harvia griffin COLOUR LIGHT Control unit Ridici jednotka
 harvia griffin COLOUR LIGHT Control unit Ridici jednotka 13082008 These instructions for installation and use are intended for owners of colour light units and control units and for electricians responsible
Vánoční sety Christmas sets
 Energy news 7 Inovace Innovations 1 Vánoční sety Christmas sets Na jaře tohoto roku jste byli informováni o připravované akci pro předvánoční období sety Pentagramu koncentrátů a Pentagramu krémů ve speciálních
Škola: Střední škola obchodní, České Budějovice, Husova 9. Inovace a zkvalitnění výuky prostřednictvím ICT
 Škola: Střední škola obchodní, České Budějovice, Husova 9 Projekt MŠMT ČR: EU PENÍZE ŠKOLÁM Číslo projektu: CZ.1.07/1.5.00/34.0536 Název projektu školy: Výuka s ICT na SŠ obchodní České Budějovice Šablona
AKTIVACE. Nabíjení Před prvním použitím nechte chytrý náramek nabíjet po dobu 45 minut. Vysuňte zařízení z náramku.
 116HR COLOR AKTIVACE Nabíjení Před prvním použitím nechte chytrý náramek nabíjet po dobu 45 minut. Vysuňte zařízení z náramku. Připojte do USB nabíječky (5V 1A). Nabíjet lze jen z jedné strany. Pokud se
Technical data Supply voltage: 230V 50/60Hz 120V AC 24V AC/DC
 LEXIC Time switch MicroRex D11 NT 29 17 97 02 GB Operating instructions afty notes Technical data 037 00 037 93 94 41 07 upply voltage: 230V 50/60Hz 120V AC 24V AC/DC Consumption: ca. 1W Contact rating:
Střední škola obchodní, České Budějovice, Husova 9, VY_INOVACE_ANJ_741. Škola: Střední škola obchodní, České Budějovice, Husova 9
 Škola: Střední škola obchodní, České Budějovice, Husova 9 Projekt MŠMT ČR: EU PENÍZE ŠKOLÁM Číslo projektu: CZ.1.07/1.5.00/34.0536 Název projektu školy: Výuka s ICT na SŠ obchodní České Budějovice Šablona
Název společnosti: VPK, s.r.o. Vypracováno kým: Ing. Michal Troščak Telefon: Datum:
 Počet 1 SCALA2 3-45 A Datum: 2.7.217 Výrobní č.: 98562862 Grundfos SCALA2 is a fully integrated, self-priming, compact waterworks for pressure boosting in domestic applications. SCALA2 incorporates integrated
PET ACTIVITY TRACKER USER MANUAL UŽIVATELSKÝ MANUÁL. Bedienungsanleitung * Mode d emploi * Manuale dell Utente Manual do Usuário * Manual * Käyttöohje
 PET ACTIVITY TRACKER USER MANUAL UŽIVATELSKÝ MANUÁL Bedienungsanleitung * Mode d emploi * Manuale dell Utente Manual do Usuário * Manual * Käyttöohje Tractive MOTION Tractive Activity MOTION tracker pro
GENERAL INFORMATION MATCH: ALSA PRO HOT SHOTS 2018 DATE:
 GENERAL INFORMATION MATCH: ALSA PRO HOT SHOTS 2018 DATE: 7.7. - 8.7.2018 TIME SCHEDULE: Prematch - Friday registration: 6.7.2018-10.00h first shot: 6.7.2018-11.00h Mainmatch 1 - Saturday registration:
Plantronics Explorer 10. Návod k obsluze
 Plantronics Explorer 10 Návod k obsluze Obsah Vítejte 3 Obsah balení 4 Přehled náhlavní soupravy 5 Buďte opatrní 5 Pair and Charge 6 Get Paired 6 Activate pair mode 6 Use two phones 6 Reconnect 6 Charge
English... 2. Čeština... 48. Deutsch... 96
 English... 2 Čeština... 48 Deutsch... 96 V 1.22 Table of Contents Trademarks... 4 Introduction... 4 Intended use... 4 Package contents... 5 Technical specifications... 6 Safety instructions... 7 Copyright...
Vypsání závodu / Notice of Race strana/page 1/5. Compotech Cup. v lodních třídách / in classes. D-One, 7P CTL 161315
 Vypsání závodu / Notice of Race strana/page 1/5 Compotech Cup v lodních třídách / in classes D-One, 7P CTL 161315 Datum / date: 04.06.2016 05.06.2016 místo konání : Kemp Jestřábí 1, Lipno Černá v Pošumaví
WORKSHEET 1: LINEAR EQUATION 1
 WORKSHEET 1: LINEAR EQUATION 1 1. Write down the arithmetical problem according the dictation: 2. Translate the English words, you can use a dictionary: equations to solve solve inverse operation variable
PITSTOP VY_22_INOVACE_26
 PITSTOP VY_22_INOVACE_26 Vzdělávací oblast: Jazyk a jazyková komunikace Vzdělávací obor: Anglický jazyk Ročník: 9. PITSTOP 1/ Try to complete the missing words. Then listen and check your ideas. Eight
Patient Data Management
 OPERATOR S MANUAL Patient Data Management Application 3931 for use with the LATITUDE Programming System, 3300 TABLE OF CONTENTS INFORMATION FOR USE... 1 Trademark Statement... 1 Description and Use...
DC circuits with a single source
 Název projektu: utomatizace výrobních procesů ve strojírenství a řemeslech egistrační číslo: Z..07/..0/0.008 Příjemce: SPŠ strojnická a SOŠ profesora Švejcara Plzeň, Klatovská 09 Tento projekt je spolufinancován
SERVISNÍ MANUÁL PEGAS 250 E CEL OVO SERVICE MANUAL PEGAS 250 E CEL OVO
 MG136-1 PEGAS 250 E CEL OVO SERVICE MANUAL page 1 SERVISNÍ MANUÁL PEGAS 250 E CEL OVO SERVICE MANUAL PEGAS 250 E CEL OVO 1. VAROVÁNÍ WARNING UPOZORNĚNÍ Pouze osoba splňující kvalifikaci danou zákonem je
SenseLab. z / from CeMaS. Otevřené sledování senzorů, ovládání zařízení, nahrávání a přehrávání ve Vaší laboratoři
 CeMaS, Marek Ištvánek, 22.2.2015 SenseLab z / from CeMaS Otevřené sledování senzorů, ovládání zařízení, nahrávání a přehrávání ve Vaší laboratoři Open Sensor Monitoring, Device Control, Recording and Playback
Light (glass base with power cord and Ehmann dimmer, reflector, glass globe), light source, cotton gloves, installation manual
, light source, cotton gloves, installation manual") Package contents Name: BALLOONS PC858 Table light 607 850 Components included with unit: Light (glass base with power cord and Ehmann dimmer, reflector, glass globe), light source, cotton gloves, installation
Package contents Name: BALLOONS PC858 Table light 607 850 Components included with unit: Light (glass base with power cord and Ehmann dimmer, reflector, glass globe), light source, cotton gloves, installation
DIGIT modell range. Short guide TechniSat DVB-T
 CZ EN Short guide TechniSat DVB-T DIGIT modell range FR ES IT Your unit carries the CE logo, and complies with all relevant EU standards. Subject to change without notice, subject to printing errors.www.technisat.com
ROLZ-2. Portable AV/Conference Center. Assembly Instructions
 1 ROLZ-2 Portable AV/Conference Center Assembly Instructions Rolz-2 Portable AV/Conference Center Part Drawing Description Qty Part Drawing Description Qty Hardware List A 1 ½ Flat Head Screw 2 EA P-1
Výukový materiál zpracovaný v rámci operačního programu Vzdělávání pro konkurenceschopnost
 Výukový materiál zpracovaný v rámci operačního programu Vzdělávání pro konkurenceschopnost Registrační číslo: CZ.1.07/1. 5.00/34.0084 Šablona: II/2 Inovace a zkvalitnění výuky cizích jazyků na středních
ZÓNOVÉ VENTILY S VRATNOU PRUŽINOU dvoucestné VZP 2XX 230 1P 001 třícestné VZP 3XX 230 1P 001
 Návod na instalaci a použití ZÓNOVÉ VENTILY S VRATNOU PRUŽINOU dvoucestné VZP 2XX 230 1P 001 třícestné VZP 3XX 230 1P 001 CZ verze 1.2 Popis: Zónové ventily s vratnou pružinou jsou určeny do hydraulických
LOGOMANUÁL / LOGOMANUAL
 LOGOMANUÁL / LOGOMANUAL OBSAH / CONTENTS 1 LOGOTYP 1.1 základní provedení logotypu s claimem 1.2 základní provedení logotypu bez claimu 1.3 zjednodušené provedení logotypu 1.4 jednobarevné a inverzní provedení
Instalace Pokyny pro instalaci v operačním systému Windows XP / Vista / Win7 / Win8
 Instalace Pokyny pro instalaci v operačním systému Windows XP / Vista / Win7 / Win8 1. Stáhněte si instalační program HOST makro engine z oficiálního webu IABYTE. 2. Spusťte instalační program a postupujte
Izolační manipulační tyče typ IMT IMT Type Insulated Handling Rod
 KATALOG CATALOGUE 024/09/2011 IZOLAČNÍ MANIPULAČNÍ TYČ INSULATED HANDLING ROD TYP IMT KOVOVÁ MANIPULAČNÍ TYČ METALLIC HANDLING ROD TYP KMT ISO 9001:2009 ISO 14001:2005 Izolační manipulační tyče typ IMT
Encrypt1.
 Encrypt1 www.evolveo.com 1. Představení produktu Tento produkt zprostředkovává vysokorychlostní výměnu dat přes USB port mezi velkokapacitním paměťovým zařízením a počítačem, přičemž veškerá ukládaná data
GRITTY: Dekódovací engine pro RTTY
 1 GRITTY: Dekódovací engine pro RTTY Jim Hargrave W5IFP 1.0 Všeobecně Dekódovací engine GRITTY může být použitý v Logger32 k doplnění MMTTY a MMVARI pro mód RTTY. GRITTY stáhněte z http://www.dxatlas.com/gritty