|
|
|
- Luboš Oldřich Pavlík
- před 5 lety
- Počet zobrazení:
Transkript


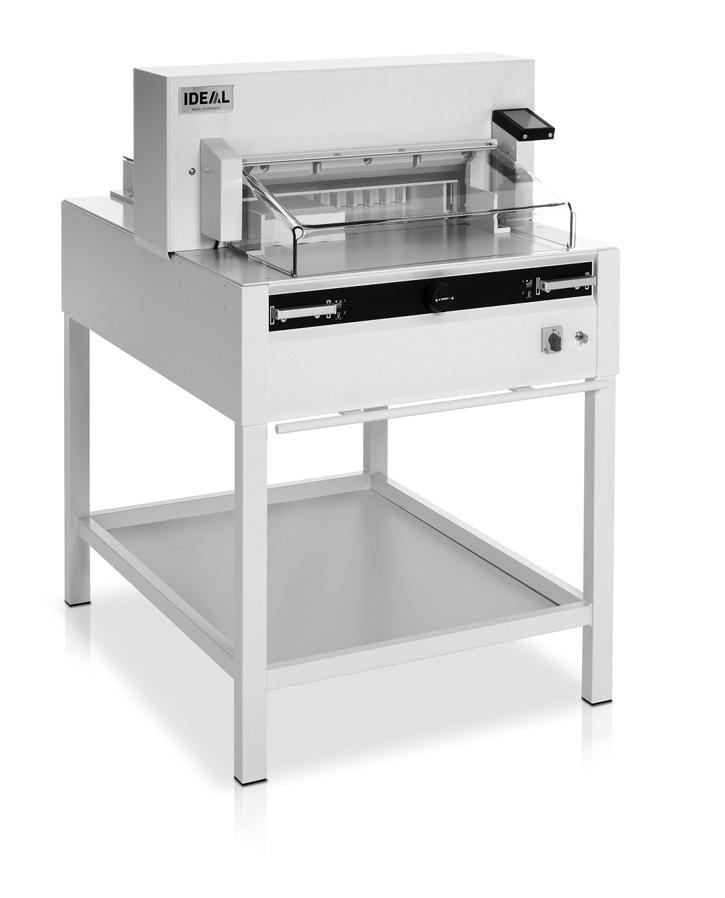

1 Guillotines GB Operating Instructions IDEL 4855 IDEL 5255 IDEL 6655
2 IDEL 4855 IDEL 5255 IDEL 6655 Safety precautions D Bitte lesen Sie vor Inbetriebnahme der Maschine unbedingt diese Betriebsanleitung und beachten Sie die Sicherheitshinweise. Die Betriebsanleitung muss jederzeit verfügbar sein. GB Please read these operating instructions before putting the machine into operation and observe the safety precautions. The operating instructions must always be available. F Nous vous prions de lire attentivement le mode d emploi avant d utiliser la machine, et attirons votre attention sur les consignes de sécurité. Les instructions d'utilisation et les consignes de sécurité doivent toujours être disponibles. Les instructions d'utilisation et les consi. NL Leest u voor de ingebruik name van het apparaat a.u.b. deze gebruiksaanwijzing goed door en neemt u de veiligheidsinstructies n acht. De gebruiksaanwijzing en de veiligheids-voorschriften moeten altijd binnen handbereik zijn. I Per favore legga questo manuale di istruzione prima di mettere in funzione il distruggidocumenti e osservi le regole di sicurezza. Le istruzioni d uso devono essere sempre disponibili. E Le recomendamos lea las instrucciones antes de poner en funcionamiento esta máquina y cumpla las normas de seguridad. Las instrucciones de servicio y seguridad deben estar siempre disponibles. S Läs igenom denna bruksanvisning innan ni startar maskinen. Var noga med säkerhetsföreskrifterna. Instruktionsmanualen måste alltid finnas tillgänglig. FIN Lue nämä käyttö-ohjeet läpi ennenkuin käynnistät laitteen! Noudata turvaohjeita. Käyttöohjeiden on oltava aina saatavilla. N Lees gjennom denne bruksannvisningen før De tar i bruk maskinen Vær oppmerksom på sikkerhetsforskriftene. Opperatørmanualen må alltid være tilgjengelig. PL Proszę uważnie przeczytać instrukcję obsługi przed uruchomieniem urządzenia i stosować się do przepisów bezpieczeństwa. Instrukcje obsługi muszą być zawsze dostępne. RUS Ïîæàëóéñòà, ïðî èòàéòå èíñòðóêöèþ ïî ýêñïëóàòàöèè ïåðåä óñòàíîâêîé àïïàðàòà, ñîáëþäàéòå òåõíèêó áåçîïàñíîñòè. Èíñòðóêöèÿ ïî ýêñïëóàòàöèè äîëæíà íàõîäèòüñÿ â äîñòóïíîì äëÿ ïîëüçîâàòåëÿ ìåñòå. H gép üzembe helyezése elott figyelmesen olvassa el a kezelési utasítást és tartsa be a biztonsági eloírásokat.kezelési utasításnak mindig elérhetonek kell lennie. TR Lütfen makineyi çalýþtýrmadan önce bu kullanma talimatlarýný dikkatli bir þekilde okuyunuz ve belirtilen güvenlik önlemlerine uyunuz. Kullanma Talimatlarý her zaman kullanýma hazýr olmalýdýr. DK Før installation af maskinen bedes De venligst læse brugervejledningen og være opmærksom på sikkerhedsanvisningerne. Brugervejledningen skal altid være tilgængelig. CZ Prosím přečtěte si instrukce k obsluze a dodržujte bezpečnostní upozornění. Návod k obsluze musí být vždy dostupný. P Por favor leiam o manual de instruções antes de colocar a máquina em operação e vejam as precauções de segurança. s instruções de operação deverão estar sempre disponíveis. GR ÐÁÑÁÊÁËÙ ÄÉÁÂÁÓÔÅ ÔÉÓ ÏÄÇÃÉÅÓ ÑÇÓÅÙÓ ÊÁÉ ÔÉÓ ÐÑÏÖÕËÁÎÅÉÓ ÁÓÖÁËÅÉÁÓ ÐÑÉÍ ÂÁËÅÔÅ ÔÏ ÌÇ ÁÍÇÌÁ ÓÅ ËÅÉÔÏÕÑÃÉÁ. ÏÉ ÏÄÇÃÉÅÓ ÑÇÓÇÓ ÐÑÅÐÅÉ ÍÁ ÅÉÍÁÉ ÐÁÍÔÁ ÄÉÁÈÅÓÉÌÅÓ. SLO Prosimo preberite navodila za uporabo ter upoštevajte varnostna opozorila preden zaženete naparavo. Navodila naj bodo vedno pri roki. SK Starostlivo si preštudujte tento návod na obsluhu pred uvedením stroja do prevádzky a najmä bezpecnostné predpisy. Držte tento návod na obsluhu na dostupnom mieste. EST Palun lugege enne masina käivitamist käesolevat kasutusjuhendit ning järgige ohutusnõudeid. Kasutusjuhend peab alati käepärast olema. CHI UE - 2-
3 Safety precautions D Keine Bedienung durch Kinder! GB Children must not operate the machine! F Pas d utilisation par un enfant! NL Geen bediening door kinderen! I Non lasciare utilizzare il tagliacarte a bambini! E No dejar que la utilicen los niños! S Installera maskinen utom räckhåll för barn! FIN sentakaa laite lasten ulottumattomiin! N Installer maskinen utenfor rekkevidde for barn! PL Dzieciom nie wolno obsługiwać urządzenia! RUS Íå äîïóñêàéòå äåòåé ê ïîëüçîâàíèþ àïïàðàòîì! H Gyerekek a gépet nem kezelhetik TR Makinayý Çocuklar Kullanmamalýdýr. DK Må kun betjenes af voksne CZ Stroj nesmí být obsluhován dětmi! P s crianças não devem trabalhar com a máquina! GR ÁÐÁÃÏÑÅÕÅÔÁÉ Ç ÑÇÓÇ ÁÐÏ ÐÁÉÄÉÁ. SLO Otroci ne smejo uporabljati naprave SK So strojom nesmú pracovat deti! EST Lapsed ei tohi masinat kasutada! CHI UE D Nicht unter das Messer fassen! GB Do not reach beneath the blade! F Ne pas passer les mains sous la lame! NL Niet met de handen onder het mes komen! I Non toccare la lama nella parte inferiore! E No tocar debajo de la cuchilla! S Sträck inte in handen under kniven! FIN Älä laita kättäsi terän alle! N Plasser aldri hender ol. under kniven! PL Nie wkładać rąk pod noże! RUS Èçáåãàéòå ïîïàäàíèÿ ðóê ïîä ëåçâèå! H Ne nyúljon a kés alá! TR Elinizi býçaðýn altýna sokmayýnýz! DK Stik ikke hænderne ind under knivbladet! CZ Nesahejte pod ostří nože! P Não tocar na parte inferior da faca! GR ÌÇÍ ÁÃÃÉÆÅÔÅ ÔÏ ÊÁÔÙ ÌÅÑÏÓ ÔÇÓ ËÅÐÉÄÁÓ! SLO Ne segajte z roko pod rezilo! SK Nevkladajte ruky pod nôž! EST Ärge pange kätt tera alla! CHI UE - 3 -
4 IDEL 4855 IDEL 5255 IDEL 6655 Safety precautions D Messer nie lose liegen lassen! Messer nur mit Messerwechselvorrichtung oder im Messertransportkasten befördern! (siehe Seite 29 und 31). Warnung! Verletzungsgefahr! GB Never leave the blade unattended! Do not extract or transport the blade without protection! (See page 29 and 31). Danger! Risk of injury! F Ne jamais laisser la lame sans protections! Elle ne doit être démontée qu à l aide du dispositif de changement de lame (cf. page 29 et 31), ou transportée dans son étui en bois! Danger! Risques de coupures! NL Laat nooit de messen alleen achter. Transporteer de messen niet zonder de houten bescherming (zie pagina 29 en 31). Waarschuwing! Opgelet voor ongevallen! I Non lasciare mai la lama incustodita. Non rimuovere o trasportare la lama senza protezione. (Vedi pagina 29 e 31). ttenzione! Rischio di infortunio! E No quitar la cuchilla sin prestar atención. No desmontar no transportar la cuchilla sin protección! (vérase pág. 29 y 31) dvertencia! Peligro de hacerse daño! S Lämna aldrig maskinen obemannad. Ta inte ur eller transportera kniven utan skydd. (se sid 29 och 31). Skaderisk! FIN Käsittele terää aina varoen. Älä siirrä tai kuljeta terää ilman suojaa! (katso sivu 29 ja 31 Loukkaantumisen vaara! N La aldri kniven ligge ubeskyttet. Ta aldri ut kniven eller transporter den uten beskyttelse (Se side 29 og 31) PL FRE! Muligheter for skade! Nigdy nie pozostawiać noży bez nadzoru. Nie wyciągać lub transportować noży bez osłon! (zobacz strona 29 i 31). Ryzyko skaleczenia sie! RUS Íå îñòàâëÿéòå îòêðûòîå ëåçâèå áåç ïðèñìîòðà! Íå ïûòàéòåñü èçâëå ü èëè òðàíñïîðòèðîâàòü ëåçâèå áåç ñïåöèàëüíûõ ìåð ïðåäîñòîðîæíîñòè! (Ñì. ñòðàíèöû 29 è 31) Ñîáëþäàéòå âûøå ïåðå èñëåííûå ïðàâèëà äëÿ èçáåæàíèÿ òðàâì! H TR Soha ne hagyja a kést őrizetlenül! Ne vegye ki vagy ne szállítsa a kést védőtok nélkül! (Lásd 29. és 31. oldal) Veszély! Sérülésveszély! Býçaðý hiçbir zaman gözetimsiz býrakmayýnýz! Býçaðý muhafazasýz olarak yerinden çýkartmayýnýz veya taþýmayýnýz! (Sayfa 29 ve 31 e bakýnýz) Dikkat! Yaralanma riski! - 4 -
5 Safety precautions DK CZ P GR Knivbladet må aldrig efterlades uden opsyn. Forsøg ikke at afmontere eller transportere knivbladet uden beskyttelse! (Se side 29 og 31) FRE! Risiko for legemlig beskadigelse. Nikdy nenechávejte nůž bez krytu. Nikdy nevyjímejte nebo neprepravujte nuz bez ochranného krytu (viz. strany 29 a 31) Nebezpecí! Riskujete zranení Deixar a faca sempre em local seguro! Não retirar ou transportar a faca sem protecção! (Ver pág. 29 e 31) Perigo! Risco de dano! ÌÇÍ ÁÖÇÍÅÔÅ ÔÇÍ ËÅÐÉÄÁ ÁÍÅÐÉÔÇÑÇÔÇ! ÌÇÍ ÁËËÁÆÅÔÅ ¹ ÌÅÔÁÖÅÑÅÔÅ ÔÇÍ ËÅÐÉÄÁ ÙÑÉÓ ÐÑÏÖÕËÁÎÇ (Äåßôå ó åôéêü óôéò óåëßäåò 29 & 31) ÐÑÏÓÏ Ç! ÊÉÍÄÕÍÏÓ ÔÑÁÕÌÁÔÉÓÌÏÕ! SLO Nikoli ne puščajte rezila nazaščitenega. Nikoli ne prenašajte rezilo brez zaščite. ( glej stran 29 in 31). Pozor! Nevarnost poškodbe. SK Nenechávajte nôž nechránený (nezabezpecený)! Nevyberajte alebo netransportujte nôž bez ochrany (vid s. 29 a 31)! Riziko úrazu! EST Ärge jätke lõiketera kunagi järelevalveta! Ärge pikendage ega teisaldage tera kaitseseadmeteta! (Vt lk 29 ja 31) Oht! Vigastuste oht! CHI UE
6 IDEL 4855 IDEL 5255 IDEL 6655 Safety precautions D Keine harten und splitternden Materialien schneiden! GB Do not cut hard materials or materials which may splinter! F La coupe de matériaux trop durs ou risquant des projections est interdite! NL Snij geen harde materialen of materiaal dat kan splinteren! I Utilizzare il tagliacarte esclusivamente per il taglio di risme di carta o materiali analoghi! E No cortar materiales duros o materiales que puedan astillarse! S Förstör inte hârt material eller material som kan splittras! FIN sentakaa laite lasten ulottumattomiin! N Ikke kutt hardt metall eller materiale som kan splintre! PL Nie ciąć twardych materiałów lub materiałów, które mogą ulec odpryśnięciu! RUS Äàííûé ðåçàê íå ïðåäíàçíà åí äëÿ ðåçêè òâåðäûõ ìàòåðèàëîâ èëè ìàòåðèàëîâ, êîòîðûå ìîãóò ðàñùåïëÿòüñÿ! H Ne vágjon kemény vagy olyan anyagot, amely repedhet! TR Sert veya parçalanabilecek malzemeleri kesmeyiniz! DK Der må ikke skæres i hårde materialer eller i materialer, der kan splintre! CZ Neřežte tvrdý materiál, při kterém mohou ustřelovat ostré úlomky! P Não cortar materiais duros ou materiais que possam lascar! GR ÌÇÍ ÊÏÂÅÔÅ ÓÊËÇÑÁ ÕËÉÊÁ ¹ ÕËÉÊÁ ÐÏÕ ÈÑÕÌÌÁÔÉÆÏÍÔÁÉ! SLO Nikoli ne režite trdih materialov ali materialov, ki se lahko SK razcepijo. Nerežte tvrdé materiály, alebo materiály, z ktorých môžu vystrelovat ostré úlomky. EST Ärge lõigake kõvasid materjale ega materjale, mis võivad pilbasteks puruneda! CHI UE - 6 -
7 Safety precautions The machine is designed for cutting stacks of paper to a specified size. This machine is constructed for "one-man operation" only! Warning! Clips or similar damage the cutting blade. Disconnect from the mains before starting any service work or before removing the panels! Replacement of blade and cutting stick may be performed only when the main switch is switched off! - 7 -
8 IDEL 4855 IDEL 5255 IDEL 6655 Safety precautions ll components which could endanger the operator are covered by a guard! B Operating the machine without safety device is forbidden! (Front safety guard (), rear screwed safety guard (B) and panel (C). C C - 8 -
9 Safety precautions The dangerous cutting movement is safeguarded by a movable guard () and a safety two-handed control system! (B) Before working with the machine and after every blade replacement the automatic cut-off function of safety guard (),(correct if distance between cover and table is < 20 mm) main switch (B) and control panel (C) must be checked. C B - 9 -
10 IDEL 4855 IDEL 5255 IDEL V / 10 min 115V / 15 min Safety precautions Connect the power cord to a single phase socket. Ensure free access to mains! When not in use for a longer period switch off. (Main switch to "0")
11 Safety precautions Protect mains cable against heat, oil and sharp edges! Danger! Blade must always be covered by the pressing bar. Clamping OK Blade OK
12 IDEL 4855 IDEL 5255 IDEL 6655 Installation Remove the stand from the wooden pallet. 4 strong people are required to lift the machine from the pallet and place it on the stand. Secure with 4 screws (). Put the shelf (B) on the stand. (Parts and tools are in the tool set (C)
13 Installation Tools can be kept in the holder provided. Cutting sticks () can be put in the tool holder
14 IDEL 4855 IDEL 5255 IDEL 6655 Installation Side tables (), left and right are available as an option (Nr ). Plug into socket. The machine must be connected directly to the socket
15 Operation It is forbidden to operate the machine if the operating and safety instructions have not been understood. Please check the safety devices are functioning and complete before use. ll covers have to be mounted (). The release for cutting is allowed only if the cover is closed and the two-hand safety device is operated at the same time (B) If the front cover closes by itself the gas spring (X) needs replacing. We recommend you keep a record of your test results. B X
16 IDEL 4855 IDEL 5255 IDEL 6655 D Operation Position the main switch to "I" (). Insert the key for the control system and move it to the right (B). Open the safety guard (C). The machine is now ready for use. Press S button (D). Machine will automatically go to the start position. C B The measurement is set either with the handwheel () or by programming (B) the cutting measurements. Measurement is shown on the display in inches or cm (B). B
17 Operation B Optical cutting line () that indicates the exact position of the cut. Blade cuts on the front edge (B) of the light beam. (Only use when no exact cut is required). B C Position the paper on the backgauge () and side lays left or right (B). To move paper stacks, please use the paper knock-up block (C) provided. (Run backgauge to the front for turning the paper stack). B
18 IDEL 4855 IDEL 5255 IDEL 6655 Operation The clamp moves automatically when cutting is activated. The paper can also be pressed in advance. Clamping and cutting is activated by the actuators () on the front table. The actuator has 2 switching steps: 1. pre-clamping 2. automatic clamping and cutting Switch position 1 + = Pre-clamping Press down both actuators to step 1 + = Switch position 2 + = Clamp returns Press down completely one of the actuators Cutting sequence with automatic clamping Press down both actuators to step
19 Operation Close the safety guard. Cutting activation: Press both actuators of the two-handed control system () simultaneously and keep pressed until the paper is completely cut. To interrupt or stop cutting: To interrupt or stop cutting, release both actuators () of the two-handed control
20 IDEL 4855 IDEL 5255 IDEL 6655 Operation Operating elements - Safety two-handed control system Pre-clamping and cutting B - Overload switch (blade drive/clamp drive/ backgauge drive) C - Backgauge control D - Main switch E - Hand-wheel for backgauge setting F - Key switch G - Backgauge H - Side lay left and right I - Front safety guard Start machine Main switch D to position "I", insert the key F for the control panel and turn to the right. Start screen appears The following functions are changeable: Brightness CM/INCH Touchtone ON/OFF Language T Press STRT J backgauge G moves to the rear and searches for the reference position, wait until a measurement is shown in the display C IDEL 4855 = 45 cm, inches IDEL 5255 = 52 cm, inches IDEL 6655 = 61 cm, inches The DIN measurements in cm (3, 4, 5, 6) and in inch (LD, LG, LT, hlt) are recallable with the respective buttons. Warning! Before storing or cutting a measurement please check if the correct measurement scale (cm or inch) see above is stored. For information on how to store see picture below left. Is shown on the screen see K. fter 30 minutes the screen switches to energy-saving mode The screen is reactivated by touching the keypad area L
21 Operation Cutting activation Warning! Run backgauge to the front for turning the paper stack Do not interrupt the upward movement of the blade by performing switching procedures Wait until the display is green before activating a cut Blade must always be at the top and be covered by the clamp. Do not touch the blade (see safety information on page 34). Risk of injury! T 2 1 Cutting to specified dimensions Press MNUL Enter dimension on the numerical key pad L Measurement is shown in red (If a wrong dimension is entered this can be corrected by pressing the Y button) Press STRT M dimension is approached, Measurement is shown in green Insert paper and move by means of the stacking angle J to the backgauge G and side lay on the left H Release the cut. Cut according to markings Press MNUL djust the backgauge with the hand-wheel E to the back Insert paper and move by means of the stacking angle I to the backgauge G and side lay on the left H Turn the hand-wheel E to the right until the marking on the paper to be cut is below the cutting line indicator The further the hand-wheel E is turned to the right, the quicker the backgauge moves. If the hand-wheel is turned to the left the backgauge will return quicker
22 IDEL 4855 IDEL 5255 IDEL 6655 T Operation Eject function If EJECT N is pressed instead of STRT M, after inserting the measurement L, the backgauge will advance forwards so that paper can be removed. Finally the backgauge moves to the last setting. Multiple cut Enter the start dimension on the display L dvance to the measurement with the STRT M Push the paper to the backgauge G O Press multiple cut Multiple cut sign appears top left together with the value P Enter multiple cut measurement (appears in red letters) Press STRT the backgauge advances by the multiple cut size This is repeated everytime a cut is activated. Exiting program-mode Press multiple cut O (yellow). Multiple cut sign and value are deleted
23 Operation T Programming This control system enables you to store 99 programs with 99 programmable steps. One step represents one measurement. fter entering the program numbers you are able to change between several program steps with the button j and b. First figure on display Q = program number. Second figure on display R = program step. Smallest cutting measurement IDEL ,0 cm/1.18 inch IDEL ,5 cm/1.38 inch IDEL ,5 cm/0.98 inch Each program step corresponds to one dimension. The indicated program step can be overwritten at any time. These programs remain stored when the machine is off. Entering a program Press PRG. EDIT "Load program no." appears Enter program number , with (Top number Q on display = program number) If measurement is shown on the display the program is reserved, select another program Program step "01 Step" R appears. (Second figure on display R = program step. Enter dimension, or move the backgauge to the desired measurement with the hand-wheel E Store the measurement,next program step appears. Enter the next measurement and with Enter store the measurement etc. Should the entered program be required immediately press PRG. RUN Press Enter Press STRT Escape the program mode press MNUL Cancel a program Press PRG. EDIT Scroll with PRG until "Delete program no." appears Enter Program number Press Enter Press Enter
24 IDEL 4855 IDEL 5255 IDEL 6655 T Operation dapting a program when the printer s imprint deviates Press PRG. RUN "Load program no." appears Enter program number , and with 2 x Enter proceed to Step 1 Correct the cutting position of the backgauge with the hand-wheel MODIFY V appears on the screen and the measurement flashes To store press MODIFY Release a cut and turn the paper If the printer s imprint deviates it can be corrected during the first two cuts via the hand-wheel see above Correction is only possible during the first two cuts fter leaving the PRG. RUN mode the original data is stored again. Delete a step Press PRG. EDIT Enter program number, confirm with Enter Select program step with the arrow keys b and j Scroll with STEP until "Delete step no." appears, Press 2 x Enter. Insert a step Press PRG. EDIT Select a program, confirm with Enter Scroll with STEP until "Insert step no." appears Enter insert position e.g. 02 Confirm with Enter Enter a measurement Store the measurement with The cutting position can be shown on the screen with the arrow keys b and j. Changing a program step Press PRG. EDIT Select a program, confirm with Enter Scroll with STEP until "Load step no." appears Enter step position e.g. 03 Confirm with Enter Enter a new measurement, Store the measurement with
25 Operation T T Eject function program If a short measurement e.g. 30 cm and then a long measurement e.g. 40 cm is cut at the start of a program then it is wise to insert an EJECT S after the first cut so that the paper is pushed to the front. The EJECT function can be added each time a measurement is entered and ejects before advancing to the next measurement. When the eject function is programmed an "E" S appears top right in the display. Inserting an Eject function subsequently in the program. Select a program and advance to the step to be changed with the arrow keys b and j Enter the new measurement and before activating the enter button EJECT N. Example of a program eject function Press PRG. EDIT Enter program number e.g. 08 Press Enter 1. Enter program Step e.g. 30 cm Press Enter press 2. Enter program Step e.g. 40 cm Press EJECT and with Enter store the dimension. How the example works Press PRG. RUN Enter program number 08 Press Enter, Press STRT, Measurement is approached Insert paper Release cut 1 Eject (Ejection is completed, turn the paper) The backgauge moves to program step 2 Release cut 2 Multiple cut program Press PRG. EDIT Enter program number Enter the 1. program step e.g. start-up measurement 40 cm Store the measurement with Enter Press the multiple cut symbol Enter the number of cuts T with the + button U (max. 15 cuts) followed by the multiple cut size (cutting width). Store with Enter. O
26 IDEL 4855 IDEL 5255 IDEL 6655 Blade and cutting stick replacement If the cutting quality decreases: Check the cutting depth (see page 34). Check the cutting stick (see page 30). Replace or grind the blade (see page 26-34). The blade cannot be ground if the blade height is less than 83 mm/3,29 inches. new blade must be used. The blade may only be ground by a qualified supplier or from the manufacturer Krug & Priester, D Balingen. Danger! Risk of injury! The blade is extremely sharp. Do not extract or transport the blade without protection. Changing the blade may only be performed by trained staff
27 Blade and cutting stick replacement Turn the blade depth adjustment screw to the left until it stops. (Screwdriver found in tool set () or tool holder (B). 1. Close the safety guard (1.). Lower the blade by pressing both cutting actuators (2.). Keep one actuator pressed and turn off the main switch (3.)
28 IDEL 4855 IDEL 5255 IDEL 6655 Blade and cutting stick replacement C The 3 eccentrics are now exposed and should be turned counter clockwise to position "0" with the special wrench and attachable extension pipe () (in the tool set). The slot must correspond to position "0" (B). Only IDEL 4855 Unscrew the blade screws (C) on the right hand side. B Remove the special wrench.close the safety guard, and turn on the main switch until the blade returns to the home position
29 Blade and cutting stick replacement Position the main switch to "0" (1.) Remove the 2 blade screws on the elongated holes (2.). Then put the blade changing tool () into place and fasten it to the blade (3.) Remove 2 blade screws (1.) IDEL 4855 and 3 blade screws (1.) IDEL 5255, IDEL Loosen the grips (2.) of the blade changing tool () lightly and allow the blade to be taken downwards out of the machine (3.). Place the blade into the blade carrier (B) and screw it into place (4). 2. B
30 IDEL 4855 IDEL 5255 IDEL 6655 Blade and cutting stick replacement Take out the cutting stick with a small screwdriver. If needed the cutting stick can be turned or exchanged. (The cutting stick can be used eight times). Replacing the cutting stick (not the blade). Turn the blade adjusting screw () to the left until it stops. (Otherwise the first cut will be too deep). Remove the cutting stick according to top picure. Turn the cutting stick (the non-used side must be near to the blade) and plug it into the holding bolt. Danger! Risk of injury! Cutting test after replacing the cutting stick (not the blade) Insert the paper and release the cut. If the last sheet of paper is not cut along the entire length turn the blade adjusting screw () ¼ turn to the right. If the last sheet is still not completely cut repeat this process until the last sheet is cut along the entire length
31 Blade and cutting stick replacement Take the exchange blade carefully out of the blade box and screw it to the blade changing tool (). Make sure there is a space ot 11 mm or 0.43 inches! (B). Blade must be covered! (C). Danger! Risk of injury! 11 mm 0.43 inch C B B C Place the blade to be exchanged with the blade changing tool () mounted (1.), into the blade carrier and push it up to the top and screw it into place with the grips (2.)
32 IDEL 4855 IDEL 5255 IDEL 6655 Blade and cutting stick replacement Lightly tighten 3 of the 5 blade screws with washers (1.). Remove the blade changing tool (2.). Lightly tighten the remaining blade screws with washers (3.). Return blade changing tool to tool holder (). Only IDEL 4855 Lightly screw in the right blade screw with the washer () when the blade is lowered. 3. Remove all tools and distribute paper along the entire cutting length (1.). Turn main switch to position "I" (2.)
33 Blade and cutting stick replacement 1. Lower the blade by pressing both cutting buttons (1.). Keep one button pressed and turn off the main switch (2.) With the special wrench () the 3 eccentrics should be screwed down (3.)until the paper is cut along the entire length of the blade (The blade must remain parallel, not too deep into cutting stick). 5. Turn main switch to position "I" (1.). Blade will return to upper position. Tighten the blade screws (2.) firmly
34 IDEL 4855 IDEL 5255 IDEL 6655 Blade and cutting stick replacement Paper cutting test. If the last sheet or several sheets are not completely cut, gradually turn the knob for blade depth adjustment () ¼ turn to the right until the paper is cut along the entire length. Do not set too low as blade will become blunt sooner. Danger by blade replacement! Blade must always be covered by the pressing bar (see picture below at the left). Clamping OK Blade OK
35 Maintenance and cleaning Danger! Disconnect the mains before starting any service work or before removing the cover. Maintenance work may only be performed by trained staff. D Grease the backgauge () control weekly with a grease gun. dvance the backgauge as far as possible to the front. (Use non-resinous oil or grease). Grease the remaining parts twice a year (see picture). The main switch must be on "0" (B). Remove lower panel (C). Tools in tool set or tool holder. Remove any paper. Grease the machine. Check the 4 joining bolts and 2 pushing bars for wear (D). If necessary inform your service personnel. Mount the machine. = Greasing points on the machine
36 IDEL 4855 IDEL 5255 IDEL 6655 Maintenance and cleaning Safety test The safety regulations are according to the regulations of the country where the cutting machine is operated. The manufacturer recommends a safety check is made every 5 years by an authorised service team
37 Possible malfuntions Machine does not function! Is the machine plugged in? Main switch to position "I"? () Control system activated? (B) (Turn key to the right) Release a cut see page 19. B
38 IDEL 4855 IDEL 5255 IDEL 6655 Possible malfuntions Cut cannot be made. If cover is open: close it. If cover is closed: open and re-close it. (Security check)
39 Possible malfuntions Machine turns off: Machine overloaded. Safety button () or (B) ejects. (llow 1 minute cooling time and reset the safety button () or (B). Machine blocked. Blade is blunt. Eliminate the cause, and push the safety button ().,B,C Backgauge blocked Safety button (C) ejects. Eliminate the cause, and push the safety button (C). Safety button for: = Blade drive B = Clamping drive C = Backgauge drive
40 IDEL 4855 IDEL 5255 IDEL 6655 Possible malfuntions Does not cut through the last sheet: Turn or turn around the cutting stick (), readjust the blade by means of the blade adjusting knob (B) (see page 34). Poor cutting quality or blade stays in the paper stack. Change the blade (C) (see pages B C
41 Possible malfuntions Display illumination off Machine is plugged in? () Main switch on position "I"? (B) Push in the safety button! (C) Check the units fuse and the on-site circuit breaker! B fter 30 minutes the screen switches to energy-saving mode The screen is reactivated by touching the keypad area L. C Motor runs but blade does not move downwards. Security brake has been activated! Inform the Service Team! None of the above mentioned methods helped to solve the problem: Contact Service Team under "Service" service@krug-priester.com
42 IDEL 4855 IDEL 5255 IDEL 6655 ccessories Recommended accessories: Blade Nr IDEL 5255 Nr IDEL 6655 Cutting stick (6 pieces) Nr IDEL 5255 Nr IDEL 6655 Blade changing tool 1 Nr IDEL 5255 Nr IDEL 6655 Paper knock-up block 1 Nr Side tables left and right Nr Included in delivery
43 Technical data Technical data: Power supply: 230V/50Hz/1~, 120V/60Hz/1~ Cutting height: 80 mm Leakage current < 3,5m Power cord gauge min. 1,5mm 2 (230V) Power cord gauge WG 12 (20) (120V) The exact technical specifications can be found on the technical specifications sticker () on the machine. wiring diagram is found in the electrical switch box. To claim under guarantee, the machine must still carry its original identification label. Cuttinglength mm Tabledepth mm Minimum space requirement (B X T X H) mm Weight kg IDEL * x 1000** x *** IDEL * x 1135** x *** IDEL * x 1230** x *** * with side tables: (Width) IDEL mm ** with side tables: (Depth) IDEL mm * with side tables: (Width) IDEL mm ** with side tables: (Depth) IDEL mm * with side tables: (Width) IDEL mm ** with side tables: (Depth) IDEL mm *** with side tables: IDEL Kg *** with side tables: IDEL Kg *** with side tables: IDEL Kg
44 IDEL 4855 IDEL 5255 IDEL 6655 Technical data This machine is approved by independent safety laboratories and is in compliance with the EC-regulations 2006/42/EG and 2004/108/EG. Sound level information: Sound measurement to EN : 72,5 db () Subject to alteration without notice
45 Technical data Krug + Priester has a certified quality management system according to DIN EN ISO 9001:2008 and a certified environmental management system according to DIN ISO 14001:
46 IDEL 4855 IDEL 5255 IDEL 6655 D GB F EG-KONFORMITÄTSERKLÄRUNG EC-declaration of conformity Déclaration de conformité CE - Hiermit erklären wir, daß die Bauart von - Herewith we declare that - Par la présente, nous déclarons que 4855 GS-ID Nr UL-ID Nr GS-ID Nr UL-ID Nr GS-ID Nr UL-ID Nr folgenden einschlägigen Bestimmungen entspricht - complies with the following provisons applying to it - sont conformes aux dispositions pertinentes suivantes 2006/42/EG: Maschinenrichtline, EC Machinery directive, EC Directives machines. 2004/108/EG: EMV Richtline, EMV Electromagnetic compatibility directive, EMV directives compatibilité électromagnétique. 2011/65/EU RoHS Richtlinie, RoHS directive, RoHS directives. - ngewendete harmonisierte Normen insbesondere - pplied harmonised standards in particular - Normes harmonisées utilisées, notamment EN ; EN ; EN ; EN ; EN ; EN ; EN ; EN ISO 12100; EN ; EN ; EN ISO 13857; EN ISO 11204; EN 13023; EN ISO Datum - Geschäftsführer- Bevollmächtigter für technische Dokumentation uthorized representative for technical documentation Représentant autorisé pour la documentation technique Krug & Priester GmbH u. Co KG Simon-Schweitzer-Str. 34 D Balingen (Germany)
47 Remarks:


48 IDEL Made in Germany Document Shredders Trimmers and Guillotines IDEL Balingen Germany Printed in Germany IDEL 12/2013
Made in Germany Made in Germany. Návod na obsluhu IDEAL 1134. Skartovače IDEAL IDEAL 1135. Řezačky IDEAL IDEAL 1046
 Made in Germany Made in Germany Návod na obsluhu IDEAL 1134 Skartovače IDEAL IDEAL 1135 Řezačky IDEAL IDEAL 1046 D Bitte lesen Sie vor Inbetriebnahme der Maschine unbedingt diese Betriebsanleitung und
GB Operating Instructions IDEAL 4815 IDEAL MyBinding.com 5500 NE Moore Court Hillsboro, OR Toll Free: Local:
 Guillotines GB Operating Instructions IDEL 4815 IDEL 4850 IDEL 4815 IDEL 4850 Safety precautions D Bitte lesen Sie vor Inbetriebnahme der Maschine unbedingt diese Betriebsanleitung und beachten Sie die
GB Operating Instructions IDEAL 4315 IDEAL 4350
 Guillotines GB Operating Instructions IDEAL 4315 IDEAL 4350 IDEAL 4315 IDEAL 4350 Sicherheitshinweise D Bitte lesen Sie vor Inbetriebnahme der Maschine unbedingt diese Betriebsanleitung und beachten Sie
GB Operating Instructions IDEAL IDEAL EP IDEAL
 Guillotines GB Operating Instructions IDEL 4810-95 IDEL 4850-95 IDEL 4850-95EP IDEL 5221-95EP IDEL 6550-95EP Safety precautions IDEL 4810-95 IDEL 4850-95/EP IDEL 5221-95EP IDEL 6550-95EP D GB F NL I E
GB Operating Instructions IDEAL 5222 DIGICUT
 Guillotines GB Operating Instructions IDEL Safety precautions IDEL D GB F NL I E S FIN N PL Bitte lesen Sie vor Inbetriebnahme der Maschine unbedingt diese Betriebsanleitung und beachten Sie die Sicherheitshinweise.
GB Operating Instructions IDEAL LT
 Guillotines G Operating Instructions IDEL 7228-06 LT IDEL 7228-06 LT Safety precautions D itte lesen Sie vor Inbetriebnahme der Maschine unbedingt diese etriebsanleitung und beachten Sie die Sicherheitshinweise.
ROLZ-2. Portable AV/Conference Center. Assembly Instructions
 1 ROLZ-2 Portable AV/Conference Center Assembly Instructions Rolz-2 Portable AV/Conference Center Part Drawing Description Qty Part Drawing Description Qty Hardware List A 1 ½ Flat Head Screw 2 EA P-1
GUIDELINES FOR CONNECTION TO FTP SERVER TO TRANSFER PRINTING DATA
 GUIDELINES FOR CONNECTION TO FTP SERVER TO TRANSFER PRINTING DATA What is an FTP client and how to use it? FTP (File transport protocol) - A protocol used to transfer your printing data files to the MAFRAPRINT
2N Voice Alarm Station
 2N Voice Alarm Station 2N Lift1 Installation Manual Version 1.0.0 www.2n.cz EN Voice Alarm Station Description The 2N Voice Alarm Station extends the 2N Lift1/ 2N SingleTalk with an audio unit installed
ROLZ-2. Portable AV/Conference Center. Assembly Instructions
 1 ROLZ-2 Portable AV/Conference Center Assembly Instructions Rolz-2 Portable AV/Conference Center Part Drawing Description Qty Part Drawing Description Qty Hardware List A 1 ½ Flat Head Screw 2 EA P-1
Sales Service Repair. Professional Service Fast Nationwide Shipping
 Sales Service Repair Professional Service Fast Nationwide Shipping 1-866-455-9900 www.onlineskyline.com CustomerService@onlineskyline.com Guillotines EN Operating Instructions IDEL 4855 IDEL 5255 IDEL
Gymnázium, Brno, Slovanské nám. 7 WORKBOOK. Mathematics. Teacher: Student:
 WORKBOOK Subject: Teacher: Student: Mathematics.... School year:../ Conic section The conic sections are the nondegenerate curves generated by the intersections of a plane with one or two nappes of a cone.
UPM3 Hybrid Návod na ovládání Čerpadlo UPM3 Hybrid 2-5 Instruction Manual UPM3 Hybrid Circulation Pump 6-9
 www.regulus.cz UPM3 Hybrid Návod na ovládání Čerpadlo UPM3 Hybrid 2-5 Instruction Manual UPM3 Hybrid Circulation Pump 6-9 CZ EN UPM3 Hybrid 1. Úvod V továrním nastavení čerpadla UPM3 Hybrid je profil PWM
2N LiftIP. Voice Alarm Station. Communicator for Lifts. Version
 2N LiftIP Communicator for Lifts Voice Alarm Station Version 2.4.0 www.2n.cz Description The 2N Voice Alarm Station is a switch that helps you extend 2N LiftIP with one or more audio units installed on
Quick Start Guide. Clear. Rychlý průvodce nastavením
 CZ EN Quick Start Guide Clear Rychlý průvodce nastavením Measurement Měření Před Fully prvním charge použitím the blood plně pressure dobijte monitor baterii before přístroje. first use. 1 Rest your bare
USER'S MANUAL FAN MOTOR DRIVER FMD-02
 USER'S MANUAL FAN MOTOR DRIVER FMD-02 IMPORTANT NOTE: Read this manual carefully before installing or operating your new air conditioning unit. Make sure to save this manual for future reference. FMD Module
MA251 (cz_en) Operating instructions. MA251 (cz_en) Montážní návod. Krimpovací kleště PV-CZM... pro MC3, MC4 a MC4-EVO 2
 Operating instructions. MA251 (cz_en) Montážní návod. Krimpovací kleště PV-CZM... pro MC3, MC4 a MC4-EVO 2") MA251 (cz_en) Montážní návod Krimpovací kleště PV-CZM... pro MC3, MC4 a MC4-EVO 2 MA251 (cz_en) Operating instructions Crimping pliers PV-CZM... for MC3, MC4 and MC4-EVO 2 Obsah Bezpečnostní pokyny...2
MA251 (cz_en) Montážní návod Krimpovací kleště PV-CZM... pro MC3, MC4 a MC4-EVO 2 MA251 (cz_en) Operating instructions Crimping pliers PV-CZM... for MC3, MC4 and MC4-EVO 2 Obsah Bezpečnostní pokyny...2
GENERAL INFORMATION RUČNÍ POHON MANUAL DRIVE MECHANISM
 KATALOG CATALOGUE RUČNÍ POHONY PRO VENKOVNÍ PŘÍSTROJE, MONTÁŽ NA BETONOVÉ SLOUPY MANUAL DRIVE MECHANISM FOR THE ACTUATION OF OUTDOOR TYPE SWITCHING DEVICES MOUNTED ON THE CONCRETE POLES TYP RPV ISO 9001:2009
SERVISNÍ MANUÁL PEGAS 250 E CEL OVO SERVICE MANUAL PEGAS 250 E CEL OVO
 MG136-1 PEGAS 250 E CEL OVO SERVICE MANUAL page 1 SERVISNÍ MANUÁL PEGAS 250 E CEL OVO SERVICE MANUAL PEGAS 250 E CEL OVO 1. VAROVÁNÍ WARNING UPOZORNĚNÍ Pouze osoba splňující kvalifikaci danou zákonem je
2N LiftIP. IO Extender. Communicator for Lifts. Version
 2N LiftIP Communicator for Lifts IO Extender Version 2.4.0 www.2n.cz Description The IO extender helps you extend 2N LiftIP with 1 input and 2 outputs. The purpose of the input is to cancel the rescue
Litosil - application
 Litosil - application The series of Litosil is primarily determined for cut polished floors. The cut polished floors are supplied by some specialized firms which are fitted with the appropriate technical
Název společnosti: VPK, s.r.o. Vypracováno kým: Ing. Michal Troščak Telefon: Datum:
 Pozice Počet Popis 1 SCALA2 3-45 A Datum: 2.7.217 Výrobní č.: 98562862 Grundfos SCALA2 is a fully integrated, self-priming, compact waterworks for pressure boosting in domestic applications. SCALA2 incorporates
WL-5480USB. Quick Setup Guide
 Quick Setup Guide 1 Czech 7 Install Utility Software Note1: Before installing the utility software, DO NOT inserts the into your computer. If the adapter is inserted already, Windows will detect the adapter
ADDRESS CONVERSION TABLE FOR MANUAL SETTING
 - (06-57) - ADDRESS CVERSI TABLE FOR MANUAL SETTING In the case of a multiple refrigerant system, each refrigerant system should be set an exclusive refrigerant. Conversion table of refrigerant and rotary
Uživatelská příručka. USB Charger UCH20
 Uživatelská příručka USB Charger UCH20 Obsah Úvod...3 USB Charger popis... 3 Používání nabíječky USB... 4 Nabíjení zařízení... 4 Právní informace... 5 Declaration of Conformity...6 2 Úvod USB Charger popis
Microsoft Lync WEB meeting
 User - documentation ENU and CZ version Microsoft Lync WEB meeting - Připojení k WEB meetingu prostřednictvím Microsoft Lync Date: 10. 5. 2013 Version: 0.2 ENU, CZ www.axiomprovis.cz Version description:
 11.12. 100 ΕΙΣΟΔΟΣ = E / ENTRANCE = E = = 1174 550 ΤΥΠΟΠΟΙΗΜΕΝΟ ΚΥ = 2000 (ΕΠΙΛΟΓΗ: 2100) / CH STANDARD = 2000 (OPTIONAL: 2100) 243 50 ΚΥ/CH + 293 ΚΥ/CH +103 100 ΚΥ /CH 6 11 6 20 100 0,25 ΚΑ (CO) + 45
Název společnosti: VPK, s.r.o. Vypracováno kým: Ing. Michal Troščak Telefon: Datum:
 Počet 1 SCALA2 3-45 A Datum: 2.7.217 Výrobní č.: 98562862 Grundfos SCALA2 is a fully integrated, self-priming, compact waterworks for pressure boosting in domestic applications. SCALA2 incorporates integrated
Mechanika Teplice, výrobní družstvo, závod Děčín TACHOGRAFY. Číslo Servisní Informace Mechanika: 5-2013
 Mechanika Teplice, výrobní družstvo, závod Děčín TACHOGRAFY Servisní Informace Datum vydání: 20.2.2013 Určeno pro : AMS, registrované subj.pro montáž st.měř. Na základě SI VDO č./datum: Není Mechanika
PITSTOP VY_22_INOVACE_26
 PITSTOP VY_22_INOVACE_26 Vzdělávací oblast: Jazyk a jazyková komunikace Vzdělávací obor: Anglický jazyk Ročník: 9. PITSTOP 1/ Try to complete the missing words. Then listen and check your ideas. Eight
obal manuálu, asi něco podobného jako u LC 100 asi by to chtělo lepší obrázek!!! FYTOSCOPE FS130 Instruction Guide
 obal manuálu, asi něco podobného jako u LC 100 asi by to chtělo lepší obrázek!!! FYTOSCOPE FS130 Instruction Guide možná tohle trochu zmenšit a dát sem i to varování LED RADIATION co je na další straně
NÁVOD K OBSLUZE KOMBINOVANÝ OBUVNICKÝ STROJ BT - 202
 NÁVOD K OBSLUZE KOMBINOVANÝ OBUVNICKÝ STROJ BT - 202 OBSAH I. Hlavní součásti obuvnického stroje. II. Konstrukce III. Schéma elektrického zapojení IV. Instalace a uvedení do provozu V. Obsluha stroje VI.
User manual SŘHV Online WEB interface for CUSTOMERS June 2017 version 14 VÍTKOVICE STEEL, a.s. vitkovicesteel.com
 1/ 11 User manual SŘHV Online WEB interface for CUSTOMERS June 2017 version 14 2/ 11 Contents 1. MINIMUM SYSTEM REQUIREMENTS... 3 2. SŘHV ON-LINE WEB INTERFACE... 4 3. LOGGING INTO SŘHV... 4 4. CONTRACT
DC circuits with a single source
 Název projektu: utomatizace výrobních procesů ve strojírenství a řemeslech egistrační číslo: Z..07/..0/0.008 Příjemce: SPŠ strojnická a SOŠ profesora Švejcara Plzeň, Klatovská 09 Tento projekt je spolufinancován
Hi-Res Audio/DNC Headset MDR-NC750
 Uživatelská příručka Hi-Res Audio/DNC Headset MDR-NC750 Obsah Začínáme...3 Úvod...3 Přehled... 3 Základy práce...4 Nošení náhlavní soupravy...4 Připojení náhlavní soupravy k vašemu zařízení... 4 Nastavení
SERVICE ADVISORY SA-5A
 V510 PROPELLER TYPE SERIES REPLACEMENT OF BLADE BEARING SEAL VRTULE TYPOVÉ ŘADY V510 VÝMĚNA TĚSNÍCÍ MANŽETY ULOŽENÍ LISTU 1. GENERAL A. This document provides disassembly and assembly procedure in the
NÁVOD K NASTAVENÍ VODÍTEK PILOVÉHO PÁSU ADJUSTING SAW BLADE GUIDE
 CZ Návod k nastavení Pilového pásu EN User Manual Metal band saw NÁVOD K NASTAVENÍ VODÍTEK PILOVÉHO PÁSU ADJUSTING SAW BLADE GUIDE BS 115N / BS 128PRO / BS 712N / BS 712PRO Pásové pily na kov metal band
Size / Světlost : DN 1/4 to 4 / DN 1/4 až 4
 Size / Světlost : 1/4 to 4 / 1/4 až 4 Ends / Konce : Threaded BSP / Závitové BSP Min. Temperature / Minimální teplota : -20 C Max. Temperature / Maximální teplota : +180 C Max. Pressure / Maximální tlak
PC/104, PC/104-Plus. 196 ept GmbH I Tel. +49 (0) / I Fax +49 (0) / I I
 / I Fax +49 (0) / I I") E L E C T R O N I C C O N N E C T O R S 196 ept GmbH I Tel. +49 (0) 88 61 / 25 01 0 I Fax +49 (0) 88 61 / 55 07 I E-Mail sales@ept.de I www.ept.de Contents Introduction 198 Overview 199 The Standard 200
E L E C T R O N I C C O N N E C T O R S 196 ept GmbH I Tel. +49 (0) 88 61 / 25 01 0 I Fax +49 (0) 88 61 / 55 07 I E-Mail sales@ept.de I www.ept.de Contents Introduction 198 Overview 199 The Standard 200
VOŠ, SPŠ automobilní a technická. Mgr. Marie Šíchová. At the railway station
 Název SŠ: Autor: Název: Tematická oblast: VOŠ, SPŠ automobilní a technická Mgr. Marie Šíchová At the railway station VOŠ, Provoz a ekonomika dopravy, cizí jazyk, angličtina B, odborné téma Železniční doprava
UŽIVATELSKÁ PŘÍRUČKA
 UŽIVATELSKÁ PŘÍRUČKA Plni víry a naděje míříme kupředu. S odhodláním zlepšujeme své dovednosti. Zapomeňte na zklamání, ale nikoli na svůj nevyužitý potenciál. Touha překonat sám sebe a dosáhnout hranice
Tento materiál byl vytvořen v rámci projektu Operačního programu Vzdělávání pro konkurenceschopnost.
 Tento materiál byl vytvořen v rámci projektu Operačního programu Vzdělávání pro konkurenceschopnost. Projekt MŠMT ČR Číslo projektu Název projektu školy Klíčová aktivita III/2 EU PENÍZE ŠKOLÁM CZ.1.07/1.4.00/21.2146
IDEAL 2604 IDEAL 2604 CC IDEAL 2604 SMC IDEAL 3104 IDEAL 3104 CC IDEAL 3105 IDEAL 3105 CC IDEAL 3105 SMC IDEAL 3804 IDEAL 3804 CC
 Skartovací stroje CZ Návod k obsluze IDEAL 2604 IDEAL 2604 CC IDEAL 2604 SMC IDEAL 3104 IDEAL 3104 CC IDEAL 3105 IDEAL 3105 CC IDEAL 3105 SMC IDEAL 3804 IDEAL 3804 CC IDEAL 4002 IDEAL 4002 CC IDEAL 4005
Technical data Supply voltage: 230V 50/60Hz 120V AC 24V AC/DC
 LEXIC Time switch MicroRex D11 NT 29 17 97 02 GB Operating instructions afty notes Technical data 037 00 037 93 94 41 07 upply voltage: 230V 50/60Hz 120V AC 24V AC/DC Consumption: ca. 1W Contact rating:
WORKSHEET 1: LINEAR EQUATION 1
 WORKSHEET 1: LINEAR EQUATION 1 1. Write down the arithmetical problem according the dictation: 2. Translate the English words, you can use a dictionary: equations to solve solve inverse operation variable
RIMINI. Samozavírací hydraulické závěsy Self-closing hydraulic hinges
 3 RIMINI Samozavírací hydraulické závěsy Self-closing hydraulic hinges Bartosini s.r.o. Kancelář: Karvinská 1897, 737 01 Český Těšín tel.: +420 602 322 276; e-mail: bartosini@bartosini.cz WWW.BARTOSINI.CZ
Střední průmyslová škola strojnická Olomouc, tř.17. listopadu 49
 Střední průmyslová škola strojnická Olomouc, tř.17. listopadu 49 Výukový materiál zpracovaný v rámci projektu Výuka moderně Registrační číslo projektu: CZ.1.07/1.5.00/34.0205 Šablona: III/2 Anglický jazyk
Uživatelská příručka. Xperia P TV Dock DK21
 Uživatelská příručka Xperia P TV Dock DK21 Obsah Úvod...3 Přehled zadní strany stanice TV Dock...3 Začínáme...4 Správce LiveWare...4 Upgradování aplikace Správce LiveWare...4 Použití stanice TV Dock...5
Lenovo A5000. Quick Start Guide v1.0. English/Česky
 Lenovo A5000 Quick Start Guide v1.0 English/Česky English Read this guide carefully before using your smartphone. Learning more Getting support Electronic emission notices To learn more information about
BEDIENUNGS- UND SICHERHEITSHINWEISE 3 OPERATION AND SAFETY NOTES 19 UNITÀ PRINCIPALE LP PLUS INDICAZIONI PER L USO E PER LA SICUREZZA 47
 DE LADEGERÄT LP PLUS BEDIENUNGS- UND SICHERHEITSHINWEISE 3 GB MAIN UNIT LP PLUS OPERATION AND SAFETY NOTES 19 FR UNITÉ PRINCIPALE LP PLUS INSTRUCTIONS D UTILISATION ET CONSIGNES DE SÉCURITÉ 33 IT UNITÀ
NÁVOD NA OBSLUHU AKTUALIZACE SW
 ohřev větrání chlazení podlahové VERZE 17.12 TUV objektů objektů vytápění Opatrně vyjměte z instalačního rámečku. V horní části je plastová aretace. Carefully remove the installation frame. In the upper
Připojení internetového modulu econet300 Do regulátoru ecomax 810P3-L TOUCH.
 Připojení internetového modulu econet300 Do regulátoru ecomax 810P3-L TOUCH. Connection of econet300 internet module to ecomax 810P3-L TOUCH Controller. Prosím ověřte verzi softwaru vašeho modulu ecomax.
INSTALLATION MANUAL PD 0027.01
 INSTALLATION MANUAL PD 0027.01 OUTDOOR MOTOR DRIVE FOR MV DISCONNECTORS ISO 9001:2009 ISO 14001:2005 OHSAS 18001:2008 TYPE SUP a) STORAGE / SKLADOVÁNÍ The packed devices on wooden pallet it is not allowed
DVM CHILLER. Installation manual. Module control MCM-A00N
 Installation manual Module control MCMA00N Thank you for purchasing this Samsung air conditioner. Before operating this unit, please read this installation manual carefully and retain it for future reference.
Introduction to MS Dynamics NAV
 Introduction to MS Dynamics NAV (Item Charges) Ing.J.Skorkovský,CSc. MASARYK UNIVERSITY BRNO, Czech Republic Faculty of economics and business administration Department of corporate economy Item Charges
TechoLED H A N D B O O K
 TechoLED HANDBOOK Světelné panely TechoLED Úvod TechoLED LED světelné zdroje jsou moderním a perspektivním zdrojem světla se širokými možnostmi použití. Umožňují plnohodnotnou náhradu žárovek, zářivkových
harvia griffin COLOUR LIGHT Control unit Ridici jednotka
 harvia griffin COLOUR LIGHT Control unit Ridici jednotka 13082008 These instructions for installation and use are intended for owners of colour light units and control units and for electricians responsible
Light (glass base with power cord and Ehmann dimmer, reflector, glass globe), light source, cotton gloves, installation manual
, light source, cotton gloves, installation manual") Package contents Name: BALLOONS PC858 Table light 607 850 Components included with unit: Light (glass base with power cord and Ehmann dimmer, reflector, glass globe), light source, cotton gloves, installation
Package contents Name: BALLOONS PC858 Table light 607 850 Components included with unit: Light (glass base with power cord and Ehmann dimmer, reflector, glass globe), light source, cotton gloves, installation
Střední průmyslová škola strojnická Olomouc, tř.17. listopadu 49
 Střední průmyslová škola strojnická Olomouc, tř.17. listopadu 49 Výukový materiál zpracovaný v rámci projektu Výuka moderně Registrační číslo projektu: CZ.1.07/1.5.00/34.0205 Šablona: III/2 Anglický jazyk
TKGA3. Pera a klíny. Projekt "Podpora výuky v cizích jazycích na SPŠT"
 Projekt "Podpora výuky v cizích jazycích na SPŠT" Pera a klíny TKGA3 Tento projekt je spolufinancován Evropským sociálním fondem a státním rozpočtem ČR Pera a klíny Pera a klíny slouží k vytvoření rozbíratelného
JX 070. P-47D-20 Thunderbolt 1/32. eduard. 3x X14. 6x X6. The die-cut mask for accurate canopy frame painting of the Trumpeter scale 1/32 KIT
 1/1 JX 070 eduard JX 070 P-47D-20 Thunderbolt 1/32 The die-cut mask for accurate canopy frame painting of the Trumpeter scale 1/32 KIT 3x X14 6x X6 Y1 Y1 Y2 Y2 Y1 Y1 Y2 Y2 EDUARD M.A. 2007 www.eduard.com
Návod k obsluze/user manual LAD2 Propojovací krabička/cable junction box
 Návod k obsluze/user manual LAD2 Propojovací krabička/cable junction box K zapojení/for connecting:! optického senzoru/optoelectronic safety edges! kontaktu průchozích dveří/es! lankového kontaktu/es pro
BERGAMO FIRENZE RIMINI. Samozavírače a samozavírací závěsy Floor springs and hinges
 3 BERGAMO FIRENZE RIMINI Samozavírače a samozavírací závěsy Floor springs and hinges Bartosini s.r.o. Kancelář: Karvinská 1897, 737 01 Český Těšín tel.: +420 602 322 276; e-mail: bartosini@bartosini.cz
Get started Začínáme Začíname
 Get started Začínáme Začíname Get started Začínáme Začíname 1 Insert the included AA batteries before proceeding with the installation. Před zahájením instalace vložte přiložené baterie AA. Pred začatím
DATA SHEET. BC516 PNP Darlington transistor. technický list DISCRETE SEMICONDUCTORS Apr 23. Product specification Supersedes data of 1997 Apr 16
 zákaznická linka: 840 50 60 70 DISCRETE SEMICONDUCTORS DATA SHEET book, halfpage M3D186 Supersedes data of 1997 Apr 16 1999 Apr 23 str 1 Dodavatel: GM electronic, spol. s r.o., Křižíkova 77, 186 00 Praha
HandiClamp. Single Band Repair Clamp Jednodílný Opravný Třmen INSTALLATION INSTRUCTIONS
 HandiClamp Single Band Repair Clamp Jednodílný Opravný Třmen INSTALLATION INSTRUCTIONS Montážní návod GB CZ Pioneers in pipe solutions INSTALLATION INSTRUCTIONS - English Single Band Repair Clamp 1 2 3
B-17 seatbelts. 2 sets. 4 sets Kit part 29, Kit part sets 2, 3, 4, 5 2, 3, 4, 5 1, 3, 4 1, 3, 4 PARTS TO BE REMOVED DÍLY K ODSTRANÌNÍ
 / 7 09 B-7 seatbelts /7 scale detail set for Revell kit sada detailù pro model /7 Revell eduard 7 09 APPLY EXPRESS MASK AND PAINT BEFORE GLUING POUŽÍT EXPRESS MASK NABARVIT PØED SLEPENÍM SYMETRICAL ASSEMBLY
B-17 Flying Fortress landing flaps
 1/2 72 458 B-17 Flying Fortress landing flaps 1/72 scale detail set for Academy kits sada detailů pro modely 1/72 Academy eduard 72 458 APPLY EXPRESS MASK AND PAINT BEFORE GLUING POUŽÍT EXPRESS MASK NABARVIT
On-line datový list SAS4-F028P3PS2T00 SLG SPÍNACÍ SVĚTELNÉ MŘÍŽE PRO AUTOMATIZAČNÍ TECHNIKU
 On-line datový list SAS4-F08PPST00 SLG SAS4-F08PPST00 SLG A B C D E F H I J K L N O P R S T Technická data v detailu Vlastnosti Technologie Objednací informace Typ Výrobek č. SAS4-F08PPST00 077 další provedení
Výukový materiál zpracovaný v rámci operačního programu Vzdělávání pro konkurenceschopnost
 Výukový materiál zpracovaný v rámci operačního programu Vzdělávání pro konkurenceschopnost Registrační číslo: CZ.1.07/1. 5.00/34.0084 Šablona: II/2 Inovace a zkvalitnění výuky cizích jazyků na středních
SERVICE MANUAL PEGAS 250 E CEL SERVISNÍ MANUÁL PEGAS 250 E CEL
 MG-011-05 PEGAS 250 E CEL SERVICE MANUAL page 1 SERVISNÍ MANUÁL PEGAS 250 E CEL SERVICE MANUAL PEGAS 250 E CEL 1. VAROVÁNÍ WARNING UPOZORNĚNÍ Pouze osoba splňující kvalifikaci danou zákonem je oprávněna
Bezpečnostní odfukovací ventil Safety relief Valve SBV - Type 11
 Bezpečnostní odfukovací ventil Safety relief Valve SBV - Type 11 GmbH Akaziengasse 36, P.O.B.63, 1234 Vienna, AUSTRIA Tel.: +43 / 1 / 699 96 00 0 E-mail: brunnbauer@brunnbauer.at Fax.: +43 / 1 / 699 96
VESTAVBOVÝ RÁM - ROLLO JUMBO
 VESTAVBOVÝ RÁM - ROLLO JUMBO Montageanleitung / Mounting Instruction / Montážní návod Nur von Erwachsenen zu bedienen! Kinder nicht an der Bildwand spielen lassen! Operation by adults only! Do not let
Strana 1 / BATTERY COVER COMPLETE E 1
 1 / 4 2 / 4 3 / 4 4 / 4 1 / 3 Položka Číslo dílu Popis ZměnaMnožstv N/O Prodej Nákup Poznámka 001 142585-1 BATTERY COVER COMPLETE E 1 C10 263005-3 vymezovací čep 6 1 8,00 C20 890380-0 CAUTION LABEL 1 002
SPECIFICATION FOR ALDER LED
 SPECIFICATION FOR ALDER LED MODEL:AS-D75xxyy-C2LZ-H1-E 1 / 13 Absolute Maximum Ratings (Ta = 25 C) Parameter Symbol Absolute maximum Rating Unit Peak Forward Current I FP 500 ma Forward Current(DC) IF
Gymnázium a Střední odborná škola, Rokycany, Mládežníků 1115
 Číslo projektu: Číslo šablony: Název materiálu: Gymnázium a Střední odborná škola, Rokycany, Mládežníků 1115 CZ.1.07/1.5.00/34.0410 II/2 Parts of a computer IT English Ročník: Identifikace materiálu: Jméno
 If there is any inconsistency of weather forecast between Local Weather Station and this unit, the Local Weather Station's forecast should prevail. The trend pointer displayed on the LCD indicates the
Pokyny k použití. Model-300. Napájecí zdroj. Návod na obsluhu Operating Instructions. se systémem Aquacontrol Napájací zdroj
 Pokyny k použití Model-300 Návod na obsluhu Operating Instructions Napájecí zdroj se systémem Napájací zdroj so systémom Power Supply with System BK 0011900 / PC AQUACONTROL Kryt aquacontrol Kryt aquacontrol
AUTOMATICKÝ DÁVKOVAČ Harvia. Návod na instalaci a použití instructions for installation and Use
 AUTOMATICKÝ DÁVKOVAČ Harvia Návod na instalaci a použití instructions for installation and Use 15122011 CZ EN 1. OBECNÉ INFORMACE 1. GENEraL Účelem Harvia automatického dávkovače je aplikovat vodu a směs
The door must be closed when operating the document shredder! Během provozu skartovacího stroje musí být dvířka zavřená!
 Strana 6: Safety precautions Bezpečnostní opatření The door must be closed when operating the document shredder! Během provozu skartovacího stroje musí být dvířka zavřená! Ensure free access to mains Zajistěte
Postup objednávky Microsoft Action Pack Subscription
 Postup objednávky Microsoft Action Pack Subscription DŮLEŽITÉ: Pro objednání MAPS musíte být členem Microsoft Partner Programu na úrovni Registered Member. Postup registrace do Partnerského programu naleznete
2N Lift8 Audio unit shaft
 2N Lift8 Audio unit shaft Brief Manual Version 3.0.0 www.2n.cz This audio unit is designed for installation on the lift shaft bottom or lift cabin roof, or wherever it is necessary to communicate (during
STAVEBNÍ PŘIPRAVENOST GILOTINA VLO DIMENSIONAL SHEET VLO MASSBLATT VERTIKALER BESCHLAG VLO МОНТАЖ МЕТАЛЛОКОНСТРУКЦИИ ВОРОТ СИСТЕМЫ ГИЛЬОТИНА ВЛО
 CZ VOLNÝ PROSTOR PRO POHYBUJÍCÍ SE VRATA EN FREE SPACE FOR THE DOORMOVEMENT DE FREIRAUM FÜR DIE BEWEGUNGSABLÄUFE RU РАЗМЕРЫ НЕОБХОДИМЫЕ ДЛЯ УСТАНОВКИ ВОРОТ CZ A - šířka otvoru B - výška otvoru C - nadpraží
Vánoční sety Christmas sets
 Energy news 7 Inovace Innovations 1 Vánoční sety Christmas sets Na jaře tohoto roku jste byli informováni o připravované akci pro předvánoční období sety Pentagramu koncentrátů a Pentagramu krémů ve speciálních
BEST BRASS RESIN AROUND!
 648 228 F-4J cockpit 648 228 F-4J cockpit For Academy kit pro stavebnici Academy For Academy kit pro stavebnici Academy R3 2pcs. 1/48 scale R2 2pcs. 2pcs. R5 2pcs. R4 2pcs. R7 R8 0 R9 1 3 5 2 8 R24 6 4
JX 069. F-100D Super Sabre 1/32. eduard. The die-cut mask for accurate canopy frame painting of the Trumpeter scale 1/32 KIT 1/1 JX 069
 1/1 JX 069 eduard JX 069 F-100D Super Sabre 1/32 The die-cut mask for accurate canopy frame painting of the Trumpeter scale 1/32 KIT Q2 Q2 LIQUID MASK Q2 Q1 Q1 EDUARD M.A. 2007 www.eduard.com Made in Czech
Switch on the appropriate breaker and verify that the light is working properly.
 Package contents Name: MONA WALL PC970 wall light 445 Components included with unit: glass shade with light source, 1x metal light body, 1x wall mount, 3x terminal connectors, 2x hex screws M5, 1x hex
F-15E Strike Eagle seat
 1/1 49 410 F-1E Strike Eagle seat 1/48 scale detail set for ACADEMY kit sada detailů pro model 1/48 ACADEMY eduard 49 410 APPLY EXPRESS MASK AND PAINT BEFORE GLUING POUŽÍT EXPRESS MASK NABARVIT PŘED SLEPENÍM
TECHNICKÝ LIST řada mechanických odvaděčů kondenzátu AUTODRAIN TECHNICAL DATA SHEET for mechanical autodrain equipment AUTODRAIN
 Popis: Nádoba s mechanickým plovákem k odstraňování pevných nečistot, vody, aerosolů, uhlovodíků, prachu oddělených separátory KING AIR se systémem stlačeného vzduchu. Rozdělení dle využití instalace:
Montážní návod Mounting instructions. Rám / bracket Zetor Forterra CL (Stage IV)
") Montážní návod Mounting instructions Rám / bracket Zetor Forterra CL (Stage IV) 9 7751 246 5 Rám / bracket Zetor Forterra CL (Stage IV) 9 7751 246 5 Strana 2 Rám / bracket Zetor Forterra CL (Stage IV)
Montážní návod Mounting instructions Rám / bracket Zetor Forterra CL (Stage IV) 9 7751 246 5 Rám / bracket Zetor Forterra CL (Stage IV) 9 7751 246 5 Strana 2 Rám / bracket Zetor Forterra CL (Stage IV)
LOGOMANUÁL / LOGOMANUAL
 LOGOMANUÁL / LOGOMANUAL OBSAH / CONTENTS 1 LOGOTYP 1.1 základní provedení logotypu s claimem 1.2 základní provedení logotypu bez claimu 1.3 zjednodušené provedení logotypu 1.4 jednobarevné a inverzní provedení
AKTIVACE. Nabíjení Před prvním použitím nechte chytrý náramek nabíjet po dobu 45 minut. Vysuňte zařízení z náramku.
 116HR COLOR AKTIVACE Nabíjení Před prvním použitím nechte chytrý náramek nabíjet po dobu 45 minut. Vysuňte zařízení z náramku. Připojte do USB nabíječky (5V 1A). Nabíjet lze jen z jedné strany. Pokud se
MC Tlumiče (řízení pohybu) MC Damper
 MC Damper") MC Tlumiče (řízení pohybu) MC Damper Fitness a volný čas Leisure and Training equipment Strojírenství Machinery Automobilový průmysl Vehicle Industry MC Tlumiče (pro řízení pohybu) se používají jako bezpečnostní
MC Tlumiče (řízení pohybu) MC Damper Fitness a volný čas Leisure and Training equipment Strojírenství Machinery Automobilový průmysl Vehicle Industry MC Tlumiče (pro řízení pohybu) se používají jako bezpečnostní
CZ.1.07/1.5.00/
 Projekt: Příjemce: Digitální učební materiály ve škole, registrační číslo projektu CZ.1.07/1.5.00/34.0527 Střední zdravotnická škola a Vyšší odborná škola zdravotnická, Husova 3, 371 60 České Budějovice
B-17 surface panels S.A.
 1/3 72 537 B-17 surface panels S.A. 1/72 scale detail set for REVELL kit sada detailù pro model 1/72 REVELL eduard 72 537 APPLY EXPRESS MASK AND PAINT BEFORE GLUING POUŽÍT EXPRESS MASK NABARVIT PØED SLEPENÍM
Service Instruction F400-14a
 Service Instruction F400-14a Item + rev. 540783 540784 Subject Výměna ložisek nábojů MB16-66, LS15 GLADEL Rev. Modification Date Author name ECN - Original version jjjj/mm/dd Name A 2011-04-08 P.Mauci
MAIN APPLICATIONS AIRCRAFT INDUSTRY POWER INDUSTRY TRANSPORTATION INDUSTRY MINING AND CHEMICAL INDUSTRY GENERAL INDUSTRY
 MAIN APPLICATIONS AIRCRAFT INDUSTRY POWER INDUSTRY TRANSPORTATION INDUSTRY MINING AND CHEMICAL INDUSTRY GENERAL INDUSTRY 2 ISO 9001 BASIC TECHNICAL PARAMETERS 4 TABLE DIAMETER [MM] 800 1000 1250 1600 2000
ZB5AG6 ovl. hlavice otočná Ø22 2-polohy s návratem Ronis 455
 Technický produktový list Parametry ZB5AG6 ovl. hlavice otočná Ø22 2-polohy s návratem Ronis 455 Hlavní parametry Řada výrobků Harmony XB5 Typ produktu nebo součásti Hlava pro přepínač ovládaný klíčem
B-24J cockpit interior S.A.
 1/3 49 441 B-24J cockpit interior S.A. 1/48 scale detail set for Revell/Monogram kit sada detailů pro model 1/48 Revell/Monogram eduard 49 441 APPLY EXPRESS MASK AND PAINT BEFORE GLUING POUŽÍT EXPRESS
EX 252. eduard F-16C Block 25 Fighting Falcon 1/48. Tamiya. scale 1/48 KIT R10, R11 J11 INTERIOR COLOR BARVA INTERIÉRU RUBBER COLOR BARVA GUMY MASCOL
 1/2 EX 252 eduard F-16C Block 25 Fighting Falcon 1/48 EX 252 The die-cut mask for accurate canopy frame painting of the Tamiya scale 1/48 KIT R10, R11 J11 R9 LIQUID MASK MASCOL 1.) 2.) N2 3.) INTERIOR